Introduction: Why Your Hair Needs a Dedicated Oiling Ritual
If you have ever stared in the mirror wondering why your locks lack that glossy, salon-worthy finish despite endless conditioning treatments, the missing link in your regimen is likely a structured hair oiling routine. Far more than an old-fashioned beauty myth, intentional oiling is a scientifically backed, foundational practice designed to transform your hair health from the roots right down to the split ends.
Whether your goal is combatting daily environmental damage, soothing an irritated scalp, or unlocking rapid length retention with a targeted hair oiling routine for growth, mastering this ritual changes everything. In this comprehensive guide, we will walk you through everything you need to know from selecting the right botanical oils and mastering DIY recipes to executing the ultimate pre-wash technique and avoiding common pitfalls. It is time to step up your hair care game and discover the profound transformation a consistent schedule can bring.
What is a Hair Oiling Routine and How Does It Work?

If you have ever stared at your reflection, wondering why your tresses lack that glossy, salon-worthy sheen despite endless expensive conditioners, the missing puzzle piece is likely a structured hair oiling routine. Far more than just a random beauty trend passed down through generations, intentional oiling is a foundational practice that targets the very structural health of your strands. At its core, a hair oiling routine involves selecting targeted botanical oils, warming them slightly, massaging them into the scalp, and coating the lengths to nourish, protect, and restore balance. However, understanding how it works requires looking beneath the surface.
Understanding the Science Behind Hair Oiling Routines
Many people assume that oils add moisture to the hair, but scientifically speaking, oils are actually occlusives and emollients rather than humectants. Pure oils do not contain water; instead, they create a protective lipid seal over your hair cuticles.
When you incorporate a consistent hair oiling routine into your weekly schedule, you are actively preventing hygral fatigue the damaging process of hair swelling and contracting as it absorbs and dries water. By sealing the hair shaft, oils trap internal hydration, smooth down raised cuticle scales, and drastically reduce friction between individual strands during styling and brushing.
Why Establishing a Consistent Hair Oiling Routine Matters More Than the Oil Itself
It is easy to fall into the trap of hunting for the “miracle” oil, but the truth is that consistency trumps product exclusivity every single time. Your hair thrives on rhythm and predictable care.
- Microbiome Equilibrium: A regular schedule stabilizes your scalp’s natural sebum production, preventing it from overcompensating with excess oil or drying out into flakes.
- Cumulative Protection: Daily environmental stressors such as pollution, UV rays, and hard water strip your hair proteins over time. Regular oiling builds a cumulative shield.
- Habitual Scalp Stimulation: Sticking to a fixed timeline ensures your follicles receive steady micro-circulation, which is essential for healthy growth phases.
Without a routine, even the most expensive organic argan or rosemary oil will sit in your cabinet gathering dust, offering zero long-term transformation.
The Biological Mechanism: How Oils Penetrate Your Cuticles
Not all oils behave the same way under a microscope. The secret to a successful hair oiling routine for growth and deep repair lies in molecular weight and fatty acid profiles.
- Penetrating Oils (Low Molecular Weight): Oils rich in low-molecular-weight fatty acids such as coconut oil and monounsaturated oleic acids can actually slip beneath the outermost cuticle layer, binding to the internal hair cortex to prevent protein loss during washing.
- Sealing Oils (High Molecular Weight): Oils like castor oil or heavier botanical blends feature larger molecules that sit squarely on top of the hair strand, locking in moisture and smoothing stubborn frizz.
By understanding this biological mechanism, you can expertly layer or choose your oils depending on whether your goal is deep internal strengthening or external polish.
The Proven Benefits of Adding Hair Oiling to Your Weekly Schedule
Committing to a regular hair oiling routine does far more than just give your locks a temporary glossy sheen. When practiced consistently, it triggers profound, long-lasting transformations from your roots down to your split ends. If you are wondering about the exact advantages that make this age-old ritual a non-negotiable part of modern self-care, here are the core benefits you can expect to unlock.
How a Hair Oiling Routine Hydrates Parched Strands and Adds Deep Shine
Dry, brittle hair is often the direct result of a compromised lipid barrier that allows internal moisture to escape into the atmosphere. A well-executed best hair oiling routine acts as a protective blanket over your hair strands. Because oils are rich in essential fatty acids, they replenish the natural lipids that are routinely stripped away by chemical treatments, heat styling, and harsh sulfates.
- Smoothing the Cuticle: When oils coat the hair shaft, they physically flatten raised, jagged cuticle scales. Light reflects evenly off a flat surface, which is why your hair instantly radiates a mirror-like shine after oiling.
- Locking in Hydration: By acting as a powerful sealant, oils trap pre-existing hydration inside the cortex, keeping your hair soft, supple, and resistant to environmental dryness.
Repairing Hair Damage and Minimizing the Appearance of Split Ends
Split ends occur when the protective outer cuticle of the hair is completely worn away, leaving the inner core exposed and prone to fraying. While no topical product can permanently “glue” a split end back together for good, a consistent hair oiling routine temporarily binds frayed ends together, instantly camouflaging damage and stopping splits from traveling further up the hair shaft.
Furthermore, oils rich in vitamins and antioxidants nourish the damaged portions of your hair, restoring elasticity and preventing daily brushing from tearing the strands further.
Preventing Breakage and Promoting Stronger, Thicker Hair Growth
If your hair seems stuck at a certain length and refuses to grow past your shoulders, the culprit is rarely a lack of growth it is usually silent breakage at the ends. By strengthening the tensile strength of your hair, a targeted hair oiling routine for growth cushions each strand against friction and mechanical stress.
- Reducing Friction: Oiled hair slides smoothly against clothing and pillowcases, drastically lowering the daily friction that causes snapping.
- Follicle Nourishment: Massaging the scalp stimulates dermal papilla cells, increasing nutrient-rich blood flow to the hair follicles, which creates the optimal biological environment for thick, healthy hair development.
Protecting Your Hair from Environmental Stressors and UV Damage
Your hair deals with a relentless barrage of environmental aggressors every single day ranging from UV radiation and smog to hard water minerals and wind damage. Plant-based oils contain natural antioxidants and UV-filtering properties that neutralize free radicals before they can degrade your hair proteins. Incorporating an oiling session before stepping out or washing your hair creates a sacrificial shield, ensuring that pollution and oxidative stress attack the oil barrier rather than your delicate keratin structure.
How to Choose the Best Oils for Your Daily or Weekly Hair Oiling Routine
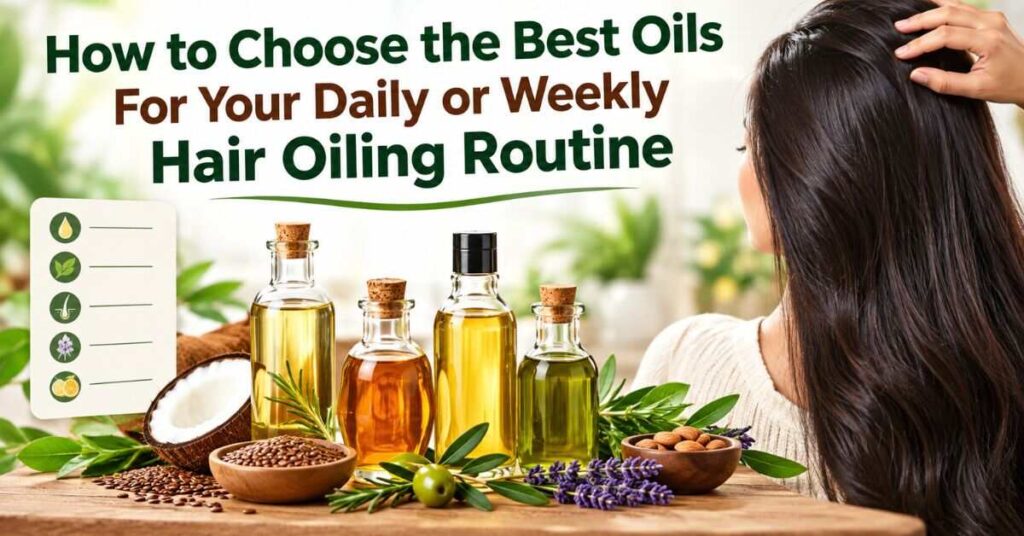
Selecting the right oil is the single most important decision you will make when building an effective hair oiling routine. With countless botanical options lining store shelves, figuring out what oil to use for hair oiling can feel overwhelming. The key is understanding that different oils possess distinct molecular weights, fatty acid profiles, and target benefits. Let’s break down the best choices to help you curate your personalized shelf.
Top Carrier and Botanical Oils to Use in Your Hair Oiling Routine
Carrier oils form the base of any successful regimen, delivering essential nutrients straight to your scalp and strands. Some of the most powerhouse botanical options include:
- Argan Oil: Packed with vitamin E and fatty acids, it provides lightweight moisture and elite frizz control without weighing down fine hair.
- Jojoba Oil: Structurally very similar to human sebum, making it exceptionally balancing for oily or irritated scalps.
- Castor Oil: A thick, deeply nourishing oil legendary for promoting dense, resilient edges and thicker growth.
- Sweet Almond Oil: Rich in magnesium and biotin, it softens coarse textures and adds incredible gloss.
Cold-Pressed vs. Refined Oils: Which to Choose for Your Hair Oiling Routine
When shopping for your ingredients, the extraction method matters just as much as the plant itself.
- Cold-Pressed Oils: These are extracted mechanically without heat, ensuring that natural antioxidants, vitamins, and active phytonutrients remain completely intact. They provide maximum nourishment for your hair and scalp.
- Refined Oils: These undergo high-heat processing and chemical filtering, which strips away much of their natural color, scent, and vital nutrients to extend shelf life.
Always opt for 100% pure, cold-pressed, and unrefined oils to ensure your hair oiling routine delivers pure, unadulterated botanical healing.
Coconut Oil vs. Argan Oil: Knowing When to Use Which
The eternal debate: coconut oil or argan oil? The answer depends entirely on your hair’s unique protein structure and porosity.
| Feature | Coconut Oil | Argan Oil |
| Molecular Structure | Low molecular weight; penetrates deep into the hair cortex. | Medium molecular weight; primarily coats the outer cuticle layer. |
| Primary Benefit | Prevents internal protein loss and strengthens weak hair. | Instantly tames frizz, adds high shine, and smooths split ends. |
| Best For | Medium-to-high porosity hair; deep pre-wash treatments. | Daily styling, fine hair, and quick hydration boosts. |
| Potential Risk | Can make protein-sensitive hair feel stiff or brittle if overused. | Extremely lightweight, rarely causes buildup or stiffness. |
Exploring Other Powerful Oils: Sesame, Almond, Jaborandi, and Moringa
Beyond the mainstream favorites, traditional and exotic oils offer specialized solutions for stubborn scalp and texture concerns:
- Sesame Oil: A staple in Ayurvedic formulations, it offers deep warming properties and exceptional sun-protective shields.
- Jaborandi Oil: Renowned for targeting weak follicles and reviving sluggish growth cycles.
- Moringa Oil: Bursting with behenic acid and vitamins, it purifies the scalp and envelops strands in a weightless defensive matrix.
Ayurvedic Favorites: Bhringraj and Amla Oil for Maximum Scalp Health
If your primary focus is ancient wisdom backed by generational success, Ayurvedic oils are unmatched. Bhringraj (often called the “King of Herbs”) stimulates dormant follicles and prevents premature graying, while Amla (Indian gooseberry) is a vitamin C powerhouse that combats dandruff, strengthens roots, and deepens natural hair pigmentation. Incorporating these into your weekly schedule elevates your standard hair oiling routine into a deeply therapeutic ritual.
Read More: linseed oil for hair || is baby oil good for your hair || moringa oil for hair || coconut oil for baby skin
DIY Custom Hair Oil Recipes for Your Personal Routine
Creating your own custom botanical blends allows you to take complete control of what goes onto your scalp and hair. Instead of relying on store-bought bottles filled with synthetic fragrances and cheap mineral oils, crafting a personal recipe ensures your hair oiling routine delivers active, targeted nourishment tailored precisely to your unique biology.
How to Find the Right DIY Recipe for Your Specific Hair Goals
Before mixing random bottles together, identify your primary hair struggle. Every great DIY formula balances a penetrating carrier oil with targeted botanical extracts or essential oils:
- For Maximum Growth: Focus on lightweight carrier bases infused with circulation-boosting extracts.
- For Deep Repair: Choose heavy, lipid-rich oils that coat and mend frayed cuticles.
- For Scalp Health: Prioritize clarifying, antibacterial oils that soothe irritation and clear buildup.
Step-by-Step Guide on How to Make Rosemary Oil at Home
Rosemary oil has taken the wellness world by storm for its incredible ability to stimulate follicles. While steam-distilled essential oil is widely available, you can easily create a nourishing rosemary-infused scalp oil right in your kitchen.
- Step 1: Gather Your Ingredients: Take a handful of fresh organic rosemary sprigs and rinse them thoroughly. Ensure they are completely bone-dry to prevent any water contamination in your oil.
- Step 2: Choose Your Carrier: Pour one cup of cold-pressed carrier oil (such as jojoba, sweet almond, or light olive oil) into a clean, dry glass jar.
- Step 3: Infuse with Gentle Heat: Submerge the rosemary sprigs into the oil. Place the jar inside a double boiler on low heat for about 2 to 3 hours, allowing the active phytonutrients to steep into the carrier base without frying the herbs.
- Step 4: Strain and Store: Let the mixture cool completely, strain out the plant matter through a fine mesh or cheesecloth into a dark amber dropper bottle, and use it regularly as part of your best hair oiling routine.
Blending Essential Oils Safely into Your Carrier Oil Base
Essential oils are hyper-concentrated plant extracts that can cause irritation or chemical burns if applied directly to the skin. Safety is paramount when customizing your formulas.
- The Dilution Rule: Always stick to a safe dilution ratio typically 2 to 3 drops of essential oil per tablespoon (15ml) of your chosen carrier oil base.
- Patch Testing: Always perform a patch test on your inner forearm or behind your ear 24 hours before applying any new essential oil blend to your scalp.
- Targeted Additions: Lavender essential oil works wonders for soothing an itchy scalp, peppermint oil creates an invigorating cooling sensation that boosts micro-circulation, and tea tree oil clears stubborn flakes.
Tailored Hair Oiling Routines for Specific Hair Types and Concerns
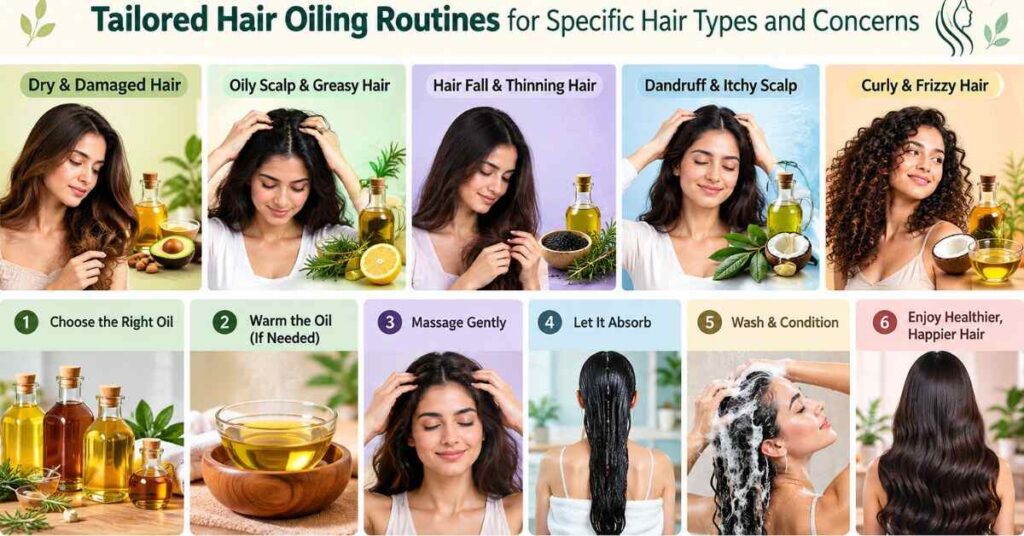
One size never fits all when it comes to hair care. What works wonders for a thick, coarse mane can easily weigh down fine, limp strands. Customizing your hair oiling routine according to your unique texture, porosity, and scalp condition ensures you get maximum transformation without unwanted side effects or greasy buildup.
Custom Hair Oiling Routine for Dry, Rough, and Frizzy Hair
Dry and frizzy hair is desperate for lipid restoration and deep hydration locking. If your strands feel like straw after a day in the sun or heat styling, your routine needs to focus heavily on medium-to-heavy emollient oils.
- The Ideal Oil Blend: A rich mixture of sweet almond oil and a few drops of argan oil.
- Application Strategy: Warm the blend slightly and apply generously from mid-lengths down to your tips, where dryness is most pronounced.
- Duration: Leave the treatment on for at least 2 hours or overnight under a satin bonnet to allow the fatty acids to deeply penetrate the dry cortex before washing out.
Specialized Hair Oiling Routine for Weak and Thinning Hair
When thinning and breakage become your primary concerns, your scalp requires targeted stimulation to reactivate dormant growth phases. This is where a focused hair oiling routine for growth becomes an absolute game-changer.
- The Ideal Oil Blend: Castor oil mixed with a lighter carrier like grapeseed oil (to make the thick castor oil easier to massage) infused with rosemary essential oil.
- Application Strategy: Focus 80% of your energy directly on the scalp using circular fingertip massage motions. This boosts micro-circulation around the dermal papilla cells.
- Frequency: Commit to this specialized scalp session twice a week to encourage dense, resilient growth at the roots.
Strengthening Hair Oiling Routine for Extra Strong & Resilient Strands
Your hair might appear relatively healthy today. Furthermore, maintaining its tensile strength requires proactive care. Consequently, you need defensive conditioning. Therefore, this prevents sudden mechanical snapping during brushing and styling within your hair oiling routine.
- The Ideal Oil Blend: Pure, cold-pressed coconut oil or olive oil.
- Application Strategy: Apply a moderate layer to dry hair 30 minutes before every single wash day. This acts as a protective cushion, minimizing protein leaching during the shampooing process.
Purifying Hair Oiling Routine for Dandruff-Presence and Itchy Scalps
A flaky, irritated scalp needs antimicrobial and soothing botanicals rather than heavy, pore-clogging butters.
- The Ideal Oil Blend: Jojoba oil base infused with tea tree and peppermint essential oils.
- Application Strategy: Part your hair in clean sections and apply directly to the scalp using a dropper. Gently massage to lift dead skin cells and soothe inflammation before cleansing.
Targeted Hair Oiling Routine for Breakage-Prone Hair Types
If your hair snaps easily under tension, your routine must prioritize elasticity and friction reduction.
- The Ideal Oil Blend: Argan oil mixed with a few drops of vitamin E oil.
- Application Strategy: Lightly glide a coin-sized amount over your damp or dry ends daily as a leave-in serum to shield against friction from clothing and styling tools.
Versatile Hair Care Routine Adaptations for Mixed Hair Textures
Combination hair requires a strategic split-application. Furthermore, you might have an oily scalp with dry, chemically treated ends. Consequently, you must skip your scalp entirely. Therefore, concentrate your hair oiling routine strictly from your ears down to your ends before washing thoroughly with a clarifying shampoo.
Step-by-Step: How to Execute the Perfect Pre-Wash Hair Oiling Routine
Executing a pre-wash oiling session is an art form. Simply dumping oil on your head achieves nothing. Furthermore, washing it out five minutes later yields no results. Consequently, you must follow a methodical hair oiling routine. Therefore, this structured process maximizes absorption, protects your cuticles, and ensures a clean washout during your best hair oiling routine.
Step 1: Start with Properly Prepped, Dry Hair
Before a single drop of oil touches your head, your hair needs to be completely dry and free of heavy styling product buildup.
- Why Dry Hair? Water and oil naturally repel each other. If your hair is soaking wet or damp, the water molecules will occupy the space inside your hair cuticles, blocking the oil from penetrating deep into the cortex.
- Detangling First: Gently brush your hair using a wide-tooth comb or a soft bristle brush starting from the ends and working your way up to the roots. Never oil tangled hair, as the oil will lock those knots in place and cause severe breakage when you try to wash it out later.
Warming the Oil: Does Heat Enhance Your Hair Oiling Routine Effectiveness?
Yes, applying gentle heat is one of the oldest and most effective trade secrets for boosting product efficacy.
- The Science of Warmth: Warming your oil slightly lowers its viscosity, making it much thinner and easier to spread evenly. More importantly, mild heat causes the outer hair cuticles to lift slightly, allowing the nourishing fatty acids and vitamins to penetrate deeper into the hair shaft.
- How to Warm Safely: Pour your desired amount of oil into a small, heat-safe glass bowl. Place that bowl into a larger container filled with hot tap water for 2 to 3 minutes. Never microwave your oil directly, as overheating destroys fragile vitamins and can accidentally burn your scalp.
Step 2: How to Distribute Oil from Mid-Lengths to Ends (And When to Skip the Scalp)
While scalp oiling is fantastic for growth, your ends need just as much attention especially if you suffer from dryness, friction damage, or split ends.
- Sectioning: Divide your hair into four clean quadrants (two in the front, two in the back) using clips. This ensures you do not miss hidden under-layers.
- Mid-Length to End Application: Take a small amount of oil in your palms, rub your hands together, and gently press and glide the oil down the lengths of each section.
- When to Skip the Scalp: If you have an excessively oily scalp, seborrheic dermatitis, or hair that falls flat easily, skip the scalp massage entirely. Restrict your best hair oiling routine strictly from the ears down to your tips to gain the smoothing benefits without weighing down your roots.
Step 3: Proper Scalp Massaging Techniques During Your Hair Oiling Routine
If your goal is stimulating growth and relieving tension, the scalp massage is the crown jewel of your entire session.
- Finger Placement: Use the pads of your fingers, never your fingernails, which can scratch and damage delicate skin to apply gentle pressure to your scalp.
- Circular Motion: Move your skin in small, deliberate circular motions rather than sliding your fingers across the hair. Start at the nape of your neck, work your way up the sides, and finish at the crown.
- Duration: Spend 5 to 7 minutes massaging your scalp. This simple act physically stretches dermal papilla cells, triggering micro-circulation that floods your hair follicles with oxygen and vital nutrients.
Step 4: Letting It Marinate: How Long to Keep Oil in Your Hair
Patience is key when letting botanical oils work their magic.
- Minimum Time: For a quick pre-shampoo treatment, let the oil sit for 30 to 45 minutes. This gives lightweight oils enough time to coat the cuticle and soften the hair.
- Deep Treatment: For maximum repair, leave the treatment on for 2 to 3 hours.
- Overnight Oiling: Can you sleep with oil in your hair? Absolutely, provided you protect your bedding. Wrap your oiled hair in a soft cotton t-shirt or a silk/satin bonnet to prevent oil transfer to your pillows, and wash it out first thing in the morning.
Step 5: The Ultimate Washout Method: Double Cleansing and Conditioning Ends Only
People often make a major mistake during a hair oiling routine. Furthermore, they fail to wash the oil out properly. Consequently, this leaves hair looking greasy and heavy. Therefore, proper cleansing remains essential for your best hair oiling routine.
- The Emulsification Trick: Before turning on the shower head, apply your first round of shampoo directly to your dry, oiled hair and massage it in. This allows the surfactants in the shampoo to bind directly to the oil molecules before water dilutes them.
- Rinse and Repeat (Double Cleanse): Rinse thoroughly with warm water, then apply a second shampoo to thoroughly clean your scalp and roots.
- Conditioning: Finish by applying a lightweight conditioner or mask strictly to your mid-lengths and ends, avoiding the roots entirely. Rinse with cool water to snap your cuticles shut and lock in mirror-like shine.
Frequency, Timing, and Best Practices for Your Hair Oiling Routine
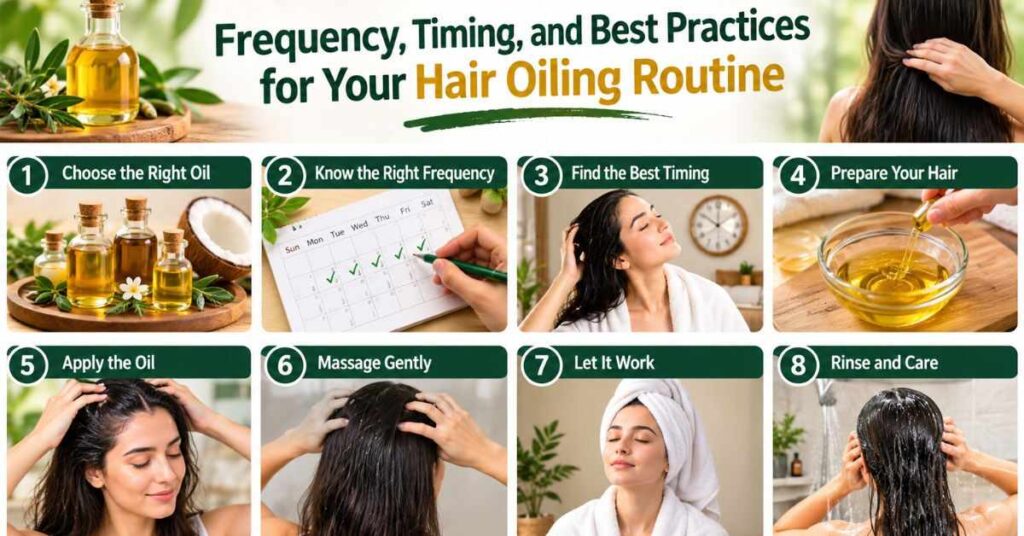
Finding the right rhythm for your hair care schedule is essential for long-term success. Too much oiling can lead to product buildup and weighed-down strands, while too little leaves your hair vulnerable to daily damage. Establishing a balanced schedule ensures your hair oiling routine delivers optimal health without overwhelming your scalp’s natural ecosystem.
How Often Should You Follow a Hair Oiling Routine Each Week?
The ideal frequency depends heavily on your unique hair texture, porosity, and daily lifestyle factors:
- Dry, Coarse, or Curly Hair: Can safely benefit from 2 to 3 times per week, as textured hair naturally struggles to distribute scalp sebum down to the ends.
- Fine, Straight, or Oily Hair: Best kept to once a week or even bi-weekly to prevent the roots from becoming excessively limp or greasy.
- Normal Hair Types: A consistent once-a-week pre-wash treatment is the golden standard to maintain deep hydration, prevent split ends, and support healthy growth without causing heavy buildup.
Should You Apply Oil to Wet or Dry Hair in Your Routine?
This is one of the most common questions when perfecting a regimen. The short answer is: always apply your pre-wash treatment to dry hair.
- Why Dry Hair Wins: Because water and oil repel one another, applying oil to wet hair creates a barrier that prevents the nourishing fatty acids from penetrating the hair shaft.
- The Exception (Leave-In Serums): If you are using a tiny drop of lightweight argan oil as a post-wash smoothing serum on damp ends to tame frizz, that is entirely acceptable. However, for deep nourishment, always start with dry, detangled locks.
What Realistic Results to Expect After 4 Weeks of a Consistent Hair Oiling Routine
Patience is vital. Hair grows roughly half an inch per month, so dramatic length transformations do not happen overnight. However, sticking to a dedicated hair oiling routine for 4 solid weeks yields noticeable improvements:
- Weeks 1 to 2: Instant reduction in frizz, smoother styling, and a noticeable calming of an itchy or flaky scalp.
- Weeks three and four bring remarkable improvements. Furthermore, you will notice a drastic decrease in post-shower breakage. In addition, your ends become softer while your natural shine is enhanced. Ultimately, improved micro-circulation sparks early baby hair growth along your hairline during your hair oiling routine.
Conclusion: Start Your Personal Hair Oiling Routine Today
Transforming your dull hair requires no expensive chemical treatments. Furthermore, you can build a thoughtful hair oiling routine. Consequently, you align your hair care with botanical wisdom. Therefore, choose your ideal oils and respect your scalp type. Ultimately, stay consistent to watch your locks flourish.
About the Author
Noor Fatima | SEO Expert & Natural Oils Specialist
Credentials:
As an SEO expert and the driving force behind Pure Oils Hub (pureoilshub.com), I combine over 8 years of digital strategy and search optimization with a deep, lifelong passion for organic aromatherapy and plant-based living.
First-Hand Experience:
“Navigating the digital landscape for more than 8 years while researching pure botanical and carrier oils has shown me that creating a truly helpful website takes more than just technical SEO. It requires a genuine commitment to cutting through the noise of commercial, synthetic products to deliver honest, thoroughly researched, and practical guides. My goal is to make natural wellness accessible to everyone, helping you discover the simple, powerful ways pure oils can transform your daily self-care routine.”
FAQs:
Can a regular hair oiling routine actually moisturize dry hair?
Technically, pure oils do not add moisture because they contain zero water molecules. Oils do not add moisture directly. Instead, they act as powerful sealants. Furthermore, they lock in pre-existing hydration and prevent hygral fatigue. Consequently, they smooth rough cuticles to make your hair feel exceptionally soft and conditioned.
Should you apply oil directly to your scalp or just the ends?
It depends entirely on your personal goals. If you want to stimulate growth, treat dandruff, and nourish roots, apply the oil directly to your scalp. Your scalp might be naturally oily. Furthermore, it could be prone to acne and buildup. Consequently, you must focus your best hair oiling routine strictly from your ears down to your ends.
What is the best time of day to perform your hair oiling routine?
Many people prefer overnight hair oiling. They let the treatment marinate for eight hours beneath a protective silk bonnet. However, a daytime session lasting two to three hours works equally well. Consequently, you can skip sleeping with oil if you prefer.
Can an over-oiling routine cause hair fall or scalp buildup?
Yes. Leaving heavy oils on your scalp too long causes issues. Furthermore, frequent oiling without proper cleansing clogs hair follicles. Consequently, this traps dirt and triggers fungal imbalances. Ultimately, it results in inflammation and increased shedding.Always double cleanse with a clarifying shampoo to keep your scalp breathing freely.
How do you prevent hair breakage during the oiling and washing process?
Always detangle your hair before applying oil to avoid locking knots in place. When washing out the oil, first apply shampoo directly to your dry, oiled hair. This clever step emulsifies the heavy lipids before water touches your strands. Afterward, handle your wet hair gently to prevent snapping.