Introduction:
If you’re wondering how to make rosemary oil for hair growth, you’re in the right place. Rosemary has been used for centuries as a natural remedy to support healthier hair, improve scalp health, and reduce excessive hair shedding. Today, many people are turning to homemade rosemary oil because it is affordable, easy to prepare, and free from unnecessary chemicals found in some commercial hair products.
Learning how to make rosemary oil for hair growth at home allows you to choose high-quality ingredients while customizing the recipe to suit your hair type. Whether you have dry, oily, curly, or damaged hair, a properly infused rosemary oil can become an effective part of your weekly hair care routine. When combined with the right carrier oil and applied consistently, it may help create a healthier scalp environment that supports stronger, fuller-looking hair over time.
Unlike synthetic hair treatments, homemade rosemary oil contains simple, natural ingredients. It can be used for scalp massages, hot oil treatments, overnight nourishment, and DIY hair masks. Better yet, preparing it yourself ensures that your oil is fresh and free from unnecessary preservatives.
In this complete guide, you’ll learn everything about how to make rosemary oil for hair growth, including the best ingredients to use, different preparation methods, proper storage, application techniques, common mistakes to avoid, and the latest research behind rosemary oil’s growing popularity.
Why Make Rosemary Oil for Hair Growth at Home?

Making rosemary oil at home offers several advantages over buying ready-made products. Many commercial rosemary oils contain fragrances, fillers, mineral oils, or very low concentrations of rosemary extract. By preparing your own, you control the quality, freshness, and strength of every ingredient.
Homemade rosemary oil is also cost-effective. A single batch can last for several weeks, making it an economical choice for anyone who wants to maintain a consistent hair care routine.
Some of the biggest benefits include:
- 100% natural ingredients
- No unnecessary chemicals or artificial fragrances
- Adjustable recipe for different hair types
- More affordable than premium hair oils
- Freshly prepared for maximum quality
- Easy to make with common kitchen ingredients
If you’ve been searching for how to make rosemary oil for hair growth at home, this guide will show you practical methods that are beginner-friendly and effective.
Is Homemade Rosemary Oil Effective for Hair Growth?
Homemade rosemary oil can be effective when it is prepared correctly and used consistently. While it isn’t a miracle cure for every type of hair loss, research suggests that rosemary may help improve scalp circulation and support healthier hair growth.
A healthy scalp is the foundation of healthy hair. Rosemary contains natural plant compounds with antioxidant and anti-inflammatory properties that may help create a better environment for hair follicles. Improved blood circulation allows follicles to receive more oxygen and nutrients, which are essential for healthy hair development.
Many people also report improvements such as:
- Reduced hair shedding
- Stronger hair strands
- Less scalp irritation
- Healthier-looking roots
- Increased natural shine
- Better overall hair texture
Results vary from person to person and depend on factors such as genetics, diet, hormones, scalp condition, and consistency of use. Most users notice visible improvements after several weeks or months of regular application rather than overnight.
Rosemary Oil vs. Rosemary-Infused Oil: What’s the Difference?
One of the most common sources of confusion is the difference between pure rosemary essential oil and rosemary-infused oil.
| Rosemary Essential Oil | Rosemary-Infused Oil |
| Highly concentrated plant extract | Carrier oil infused with rosemary leaves |
| Cannot be applied directly to the scalp | Generally safe for direct scalp application |
| Requires dilution before use | Already diluted through infusion |
| Strong aroma | Mild herbal fragrance |
| Produced through steam distillation | Made by soaking rosemary in carrier oil |
| Small amounts are used | Can be used generously for scalp massage |
This article primarily focuses on how to make rosemary oil for hair growth using the infusion method because it is safer, easier, and more practical for home use.
If you already own rosemary essential oil, you can also mix a few drops with a suitable carrier oil before applying it to your scalp. However, avoid applying undiluted essential oil directly to your skin, as it may cause irritation.
Benefits of Homemade Rosemary Oil for Hair Growth
Making homemade rosemary oil is one of the most affordable and natural ways to improve your hair care routine. Once you learn how to make rosemary oil for hair growth, you can prepare a fresh batch using quality ingredients without relying on products that may contain unnecessary chemicals or synthetic fragrances. Moreover, homemade rosemary oil allows you to customize the recipe based on your hair type and scalp condition.
The growing popularity of rosemary oil for hair growth is supported by both traditional herbal practices and modern scientific interest. Rosemary contains natural antioxidants and beneficial plant compounds that help maintain a healthy scalp environment. While it is not an overnight solution, consistent use can contribute to healthier, stronger, and fuller-looking hair over time.
Below are the key benefits of using homemade rosemary oil for hair growth and why it has become a favorite natural remedy for many people.
Stimulates Healthy Hair Growth
One of the biggest reasons people search for how to make rosemary oil for hair growth is its ability to support healthier hair growth naturally. A healthy scalp is essential for healthy hair, and rosemary helps create an environment where hair follicles can function more efficiently.
Research suggests that rosemary may improve blood circulation to the scalp. Better circulation means hair follicles receive more oxygen and nutrients, which are important for producing stronger hair strands. As a result, regular application may help support natural hair growth while maintaining overall scalp health.
Unlike harsh chemical treatments, rosemary works gently over time. Therefore, patience and consistency are essential. Most people achieve the best results by using rosemary oil two to three times each week as part of their regular hair care routine.
How rosemary supports healthy hair growth
- Improves blood circulation around hair follicles.
- Helps nourish the scalp naturally.
- Supports stronger hair roots.
- Encourages healthier hair growth cycles.
- Helps maintain thicker-looking hair over time.
- Promotes healthier scalp conditions for long-term growth.
Expert Tip: Combine a gentle five-minute scalp massage with rosemary oil application. Massaging the scalp can further improve circulation and enhance the oil’s absorption.
Helps Reduce Hair Fall and Breakage
Hair fall is one of the most common concerns affecting both men and women. Although losing some hair each day is normal, excessive shedding often indicates weak roots, poor scalp health, or damaged hair strands.
Regular use of homemade rosemary oil may help strengthen the hair from the roots to the ends. Furthermore, nourishing carrier oils such as coconut oil, argan oil, or jojoba oil provide essential fatty acids and vitamins that improve hair flexibility and reduce breakage.
When hair becomes stronger, it is less likely to snap during brushing, washing, or styling. Consequently, your hair may appear fuller simply because fewer strands are breaking.
Common causes of hair breakage include:
- Heat styling tools
- Frequent coloring or bleaching
- Tight hairstyles
- Lack of moisture
- Protein imbalance
- Environmental damage
- Rough brushing
Using rosemary oil consistently can become an important step in protecting your hair against everyday damage.
Soothes Dandruff and Dry Scalp
Healthy hair begins with a healthy scalp. Unfortunately, dryness, itching, dandruff, and product buildup can interfere with normal hair growth and make the scalp uncomfortable.
Fortunately, rosemary oil possesses natural cleansing and soothing properties that may help reduce scalp irritation. Additionally, when infused into nourishing carrier oils, it helps restore moisture without leaving excessive grease.
A well-moisturized scalp is less likely to experience excessive flaking or irritation. Moreover, healthier scalp conditions allow hair follicles to perform more effectively.
Regular scalp oiling may help with:
- Mild dandruff
- Dry scalp
- Itchy scalp
- Tight scalp feeling
- Minor irritation
- Product buildup
For best results, gently massage the oil into the scalp and leave it on for several hours before washing your hair with a mild shampoo.
Important: If you have severe dandruff, psoriasis, eczema, or another scalp condition, consult a dermatologist before relying solely on home remedies.
Strengthens Hair and Adds Natural Shine
Healthy hair is not only about growth it should also be strong, smooth, and naturally shiny. Homemade rosemary oil nourishes the hair shaft while helping reduce dryness that can make hair appear dull and lifeless.
Many carrier oils used in how to make rosemary oil for hair growth at home, such as olive oil, sweet almond oil, argan oil, and coconut oil, are rich in vitamins and healthy fatty acids. These nutrients help smooth the hair cuticle, making hair softer, shinier, and easier to manage.
With continued use, you may notice several improvements:
- Stronger hair strands
- Reduced split ends
- Less frizz
- Improved softness
- Natural shine
- Better elasticity
- Healthier-looking hair texture
Benefits at a Glance
| Benefit | How Rosemary Oil Helps |
| Hair Growth | Supports healthy hair follicles and scalp circulation. |
| Hair Fall | Helps strengthen roots and reduce breakage. |
| Scalp Health | Soothes dryness, itching, and mild dandruff. |
| Hair Strength | Improves resilience and reduces split ends. |
| Natural Shine | Smooths the hair cuticle for healthier-looking hair. |
| Hair Texture | Makes hair softer, smoother, and easier to manage. |
Key Takeaway
If you’re learning how to make rosemary oil for hair growth, understanding its benefits is just as important as knowing the recipe itself. While rosemary oil is not a miracle cure, regular use combined with proper nutrition, gentle hair care, and patience can help support healthier hair growth, reduce breakage, improve scalp health, and leave your hair looking naturally stronger and shinier.
Ingredients Needed for How to Make Rosemary Oil for Hair Growth
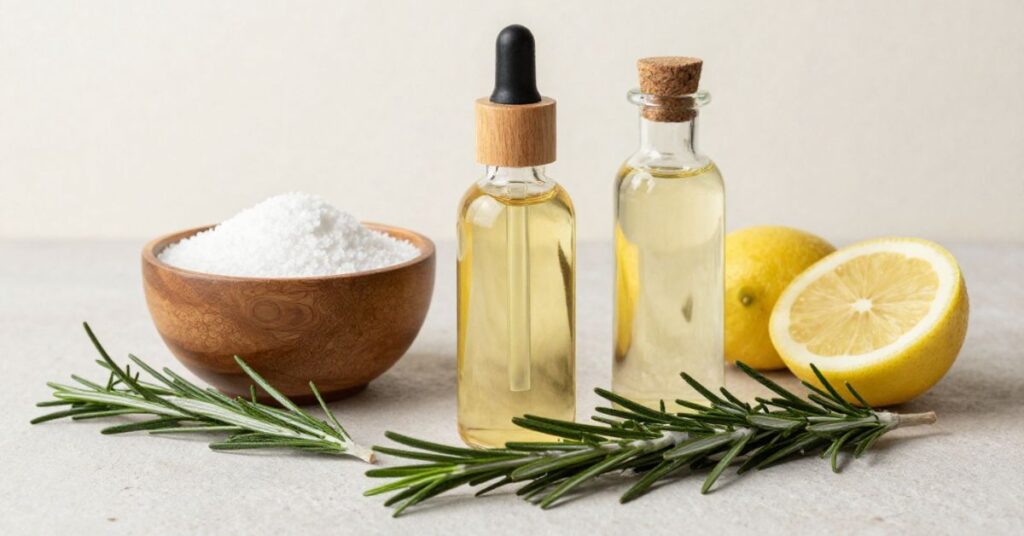
Choosing the right ingredients is the first and most important step in how to make rosemary oil for hair growth. Even the best infusion method cannot produce a high-quality hair oil if the rosemary, carrier oil, or equipment is of poor quality. Fresh, clean ingredients help create a nourishing oil that supports a healthy scalp and healthier-looking hair while also improving the oil’s freshness and shelf life.
Fortunately, you do not need expensive supplies to make rosemary oil at home. Most of the ingredients are affordable, easy to find, and simple to use. Whether you are making rosemary oil for the first time or improving your current recipe, always choose premium ingredients and clean equipment to achieve the best possible results.
Essential Ingredients for How to Make Rosemary Oil for Hair Growth
Before you begin how to make rosemary oil for hair growth, gather all of the essential ingredients and tools. Having everything prepared makes the infusion process easier while helping maintain cleanliness throughout the recipe.
| Ingredient | Purpose | Recommended |
|---|---|---|
| Fresh or Dried Rosemary | Main herb used for infusion | Yes |
| Carrier Oil | Extracts rosemary’s beneficial compounds | Yes |
| Glass Jar with Lid | Safe container for infusion | Yes |
| Fine Mesh Strainer or Cheesecloth | Filters the finished oil | Yes |
| Dark Glass Bottle | Protects oil during storage | Yes |
| Clean Spoon | Mixing and transferring oil | |
| Label (Optional) | Records preparation date | Recommended |
Pro Tip: Always wash and thoroughly dry your jars, bottles, and utensils before preparing homemade rosemary oil. Clean equipment helps reduce contamination and extends the oil’s shelf life.
Fresh or Dried Rosemary for How to Make Rosemary Oil for Hair Growth
One of the most common questions about how to make rosemary oil for hair growth is whether fresh or dried rosemary produces better results.
Both forms can create an effective rosemary-infused oil when prepared correctly. However, dried rosemary is generally the better choice because it contains very little moisture. Lower moisture significantly reduces the risk of mold, bacteria, and spoilage while allowing the rosemary to infuse safely into the carrier oil.
Fresh rosemary offers a stronger aroma and vibrant appearance, but it must be completely dried before being placed into oil. Even a small amount of remaining moisture may shorten the oil’s shelf life.
For beginners learning how to make rosemary oil for hair growth at home, dried rosemary provides the safest, easiest, and most reliable results.
| Feature | Fresh Rosemary | Dried Rosemary |
|---|---|---|
| Shelf Life | Shorter | Longer |
| Risk of Mold | Higher | Very Low |
| Easy to Store | No | Yes |
| Best for Beginners | No | Yes |
| Best for Oil Infusion | Good | Excellent |
Best Carrier Oils for How to Make Rosemary Oil for Hair Growth
Choosing the right carrier oil is just as important as choosing quality rosemary when learning how to make rosemary oil for hair growth. Carrier oils dilute the rosemary safely while providing additional nutrients that nourish both the scalp and hair.
Different carrier oils offer different benefits depending on your hair type and scalp condition.
Coconut Oil for How to Make Rosemary Oil for Hair Growth
Coconut oil is one of the most popular carrier oils because it penetrates the hair shaft deeply. It helps reduce protein loss, moisturizes dry hair, minimizes breakage, and adds natural shine. It works especially well for dry, damaged, and curly hair.
Jojoba Oil for How to Make Rosemary Oil for Hair Growth
Jojoba oil closely resembles the scalp’s natural sebum, making it an excellent option for oily or sensitive scalps. Its lightweight texture moisturizes without leaving heavy residue while helping balance natural oil production.
Sweet Almond Oil for How to Make Rosemary Oil for Hair Growth
Sweet almond oil contains Vitamin E and healthy fatty acids that improve softness, reduce frizz, and increase shine. It is suitable for normal, slightly dry, and wavy hair types.
Olive Oil for How to Make Rosemary Oil for Hair Growth
Olive oil provides deep conditioning for thick, coarse, and extremely dry hair. Rich in antioxidants and healthy fats, it helps lock in moisture while improving overall hair softness.
Argan Oil for How to Make Rosemary Oil for Hair Growth
Argan oil is often called “liquid gold” because it contains high levels of Vitamin E and essential fatty acids. It helps improve damaged, color-treated, and frizzy hair while adding softness and shine without excessive heaviness.
Grapeseed Oil for How to Make Rosemary Oil for Hair Growth
Grapeseed oil has a very light texture that works well for fine or oily hair. It moisturizes the scalp without leaving greasy buildup, making it an excellent option for frequent use.
Best Carrier Oil Choice for How to Make Rosemary Oil for Hair Growth by Hair Type
| Hair Type | Recommended Carrier Oil |
|---|---|
| Dry Hair | Coconut Oil, Olive Oil |
| Oily Hair | Jojoba Oil, Grapeseed Oil |
| Curly Hair | Coconut Oil, Sweet Almond Oil |
| Damaged Hair | Argan Oil, Coconut Oil |
| Fine Hair | Grapeseed Oil, Jojoba Oil |
| Frizzy Hair | Argan Oil, Olive Oil |
Recommended Ratio for How to Make Rosemary Oil for Hair Growth
Using the correct ratio helps produce a balanced rosemary infusion that is effective without becoming overly concentrated.
A reliable ratio includes:
- 1 cup (240 ml) carrier oil
- 2–4 tablespoons dried rosemary or 4–6 completely dried fresh rosemary sprigs
- 1 clean glass jar with an airtight lid
This proportion allows the rosemary to infuse gradually while preserving the quality and stability of the finished oil.
Important: Never place wet rosemary directly into oil. Any remaining moisture can encourage mold growth and significantly reduce the shelf life of your homemade rosemary oil. If using fresh rosemary, wash it thoroughly and allow it to air dry for 24–48 hours before beginning the infusion.
Key Takeaway for How to Make Rosemary Oil for Hair Growth
The success of how to make rosemary oil for hair growth depends largely on the quality of your ingredients. Choosing dried rosemary, selecting a carrier oil that matches your hair type, and using clean, dry equipment all contribute to a safer, longer-lasting, and more effective homemade hair oil. When these basics are combined with proper preparation and regular use, your rosemary oil can become a valuable addition to a healthy hair care routine.
How to Make Rosemary Oil for Hair Growth at Home (Step-by-Step Guide)
Learning how to make rosemary oil for hair growth at home is a simple way to create a natural hair care product using a few basic ingredients. Homemade rosemary oil combines the nourishing properties of rosemary with a carrier oil that helps deliver plant-based compounds to your scalp and hair.
Many people prefer making rosemary-infused oil at home because they can control the ingredients, avoid unnecessary additives, and prepare a fresh batch according to their hair care routine. While rosemary oil is not an instant solution for hair concerns, consistent use as part of a healthy hair care routine may help support a healthier scalp environment.
This complete guide explains how to make rosemary oil for hair growth using two popular methods: the traditional slow infusion method and the faster heat infusion method. You will also learn how to choose ingredients, store your oil correctly, and avoid common preparation mistakes.
Ingredients Needed for Homemade Rosemary Oil for Hair Growth
Before preparing your rosemary hair oil, collect high-quality ingredients and clean equipment. Using the right materials helps maintain the freshness, aroma, and overall quality of your homemade oil.
Ingredients You Will Need for Rosemary Infused Hair Oil
- 1 cup (240 ml) carrier oil: Coconut oil, jojoba oil, olive oil, sweet almond oil, or argan oil can be used depending on your preference.
- 2–4 tablespoons dried rosemary: Dried rosemary is usually recommended because it contains less moisture and reduces the risk of spoilage.
- 4–6 fresh rosemary sprigs (optional): Fresh rosemary can be used only after it has been completely dried.
- Clean glass jar: A glass container is ideal for oil infusion.
- Fine mesh strainer or cheesecloth: Used to remove rosemary pieces after infusion.
- Dark amber glass bottle: Helps protect the finished oil from light exposure.
- Clean spoon or spatula: Used for mixing ingredients safely.
Before starting, make sure every tool and container is completely clean and dry. Any leftover moisture can shorten the shelf life of homemade rosemary oil.
How to Prepare Rosemary Oil for Hair Growth Using the Slow Infusion Method
The slow infusion method is one of the most traditional ways to make rosemary oil at home. This process allows the rosemary to gradually release its natural compounds into the carrier oil without direct heat.
Although this method requires more time, many people prefer it because it helps maintain the natural characteristics of both the rosemary and the carrier oil.
Step 1: Prepare Rosemary for Homemade Hair Growth Oil
Start by checking your rosemary carefully. If you are using dried rosemary, make sure it is clean and free from dust or unwanted particles.
For fresh rosemary, wash the sprigs thoroughly and allow them to dry completely for 24–48 hours. Removing moisture is important because water trapped inside the leaves can affect the quality of your homemade oil.
Step 2: Add Carrier Oil for Rosemary Infused Hair Oil
Place the dried rosemary into a clean glass jar. Fill approximately one-third of the jar with rosemary, leaving enough space for the oil to move around the herbs.
Slowly pour your selected carrier oil into the jar until all rosemary pieces are fully covered. Leave a small amount of space at the top before sealing the container.
Step 3: Store Rosemary Oil for Natural Hair Care Benefits
Close the jar tightly and place it in a warm, dry location away from direct sunlight.
Allow the rosemary to infuse for approximately 2–4 weeks. During this period, gently shake the jar every day or every other day to help distribute the rosemary compounds throughout the oil.
Step 4: Strain Homemade Rosemary Oil Before Use
After the infusion period is complete, strain the oil using a fine mesh strainer or cheesecloth.
Transfer the filtered rosemary oil into a dark glass bottle and store it in a cool place.
Benefits of the Slow Infusion Rosemary Oil Method
- Maintains a strong herbal aroma
- Avoids direct heat exposure
- Suitable for long-term preparation
- Beginner-friendly process
- Allows gradual extraction of rosemary compounds
How to Make Rosemary Oil for Hair Growth Using the Heat Infusion Method
The heat infusion method is a faster alternative for people who want to prepare rosemary oil within a shorter time. Instead of waiting several weeks, gentle warming helps speed up the infusion process.
However, the oil should never be overheated because excessive heat may affect the quality of the carrier oil.
Step 1: Combine Rosemary and Carrier Oil for Hair Nourishment
Add your chosen carrier oil into a small saucepan and mix in dried rosemary.
Ensure the rosemary is fully covered with oil before beginning the warming process.
Step 2: Gently Heat Rosemary Oil for Faster Infusion
Warm the mixture over very low heat for around 30–60 minutes.
The oil should remain warm but should never boil or produce smoke. Gentle heat is enough to encourage the rosemary infusion process.
Step 3: Cool and Filter Homemade Rosemary Hair Oil
Remove the saucepan from heat and allow the oil to cool completely.
Once cooled, strain the rosemary pieces using a clean strainer or cheesecloth. Store the finished oil in a dark glass bottle.
Benefits of the Heat Infusion Rosemary Oil Method
- Ready within a shorter time
- Convenient for small batches
- Simple preparation process
- Useful when you need homemade rosemary oil quickly
Slow Infusion vs Heat Infusion Rosemary Oil Method: Which Is Better?
Both methods can create rosemary-infused oil, but they differ in preparation time and technique.
| Feature | Slow Infusion | Heat Infusion |
|---|---|---|
| Preparation Time | 2–4 weeks | 30–60 minutes |
| Heat Required | No | Low heat |
| Process | Natural extraction | Faster extraction |
| Best For | Maximum patience and gradual infusion | Quick homemade preparation |
| Beginner Friendly | Yes | Yes |
The best method depends on your preference. If you want a traditional approach, slow infusion is a popular choice. If you need rosemary oil quickly, gentle heat infusion may be more convenient.
How to Know When Homemade Rosemary Oil Is Ready for Hair Growth
After preparing rosemary oil, it is important to check whether the infusion process has been successful before using it.
Signs Your Rosemary Hair Growth Oil Is Properly Infused
Your homemade rosemary oil is generally ready when:
- It develops a noticeable herbal rosemary scent.
- The oil changes slightly in color.
- The rosemary leaves appear faded after releasing their compounds.
- The texture remains smooth and clean.
- There are no signs of moisture, mold, or unusual odors.
If the oil smells unpleasant, becomes cloudy, or shows signs of contamination, it is better to discard it and prepare a fresh batch.
Expert Tips for Making the Best Rosemary Oil for Hair Growth at Home
Follow these practical tips to improve the quality and freshness of your homemade rosemary oil:
- Always use completely dry rosemary.
- Choose good-quality carrier oils.
- Store the oil in a dark glass container.
- Keep the bottle away from direct sunlight and excessive heat.
- Label your bottle with the preparation date.
- Prepare smaller batches for better freshness.
- Use clean and dry tools every time.
Common Mistakes When Preparing Homemade Rosemary Oil for Hair Growth
Many beginners make small mistakes that can reduce the quality of their rosemary oil.
Avoid these common errors:
- Using wet rosemary directly in oil
- Heating oil until it boils
- Leaving rosemary exposed above the oil level
- Storing oil in direct sunlight
- Using unclean containers
- Forgetting to strain the oil properly
Proper preparation and storage help create a cleaner and longer-lasting rosemary-infused oil.
Final Tips for Creating Effective Rosemary Infused Hair Oil
Making rosemary oil at home is a simple process when you follow the correct steps. Whether you choose the slow infusion method or the heat infusion method, using dry rosemary, quality carrier oil, and proper storage techniques can help you create a fresh homemade hair oil.
Remember that homemade rosemary oil works best as part of a consistent hair care routine. Combining proper preparation with healthy scalp habits can help you maintain better overall hair care practices.
Read More:https://pureoilshub.com/oils-for-low-porosity-hair/
How to Store Homemade Rosemary Oil Properly
After learning how to make rosemary oil for hair growth, proper storage is the next important step. Even the highest-quality homemade rosemary oil can lose its effectiveness if it is stored incorrectly. Exposure to heat, sunlight, air, and moisture can gradually break down the oil, reduce its freshness, and shorten its shelf life.
Fortunately, storing rosemary oil is simple. By choosing the right bottle, keeping the oil in a cool place, and following a few best practices, you can preserve its quality for several months. Proper storage also helps maintain the oil’s natural aroma, color, and beneficial properties.
Whether you’ve prepared how to make rosemary oil for hair growth at home using the slow infusion method or the quick heat method, these storage tips will help keep your oil fresh, safe, and ready whenever you need it.
Expert Tip: Always label your bottle with the preparation date. This simple habit makes it easy to track freshness and know when it’s time to make a new batch.
Best Bottle for Storage
The type of bottle you use plays a significant role in preserving the quality of your homemade rosemary oil. Many people overlook this step, but the right container protects the oil from light exposure, oxidation, and contamination.
Why Dark Glass Bottles Are the Best Choice
Dark-colored glass bottles, especially amber or cobalt blue, are ideal because they block harmful UV rays that can degrade the oil over time. In contrast, clear glass allows more light to pass through, which may reduce the oil’s potency if it’s stored in bright areas.
Additionally, glass is non-reactive, meaning it won’t interact with the natural compounds in the oil. Unlike some plastics, glass doesn’t absorb odors or release chemicals into the oil.
Recommended Storage Bottles
- Amber glass bottle ⭐⭐⭐⭐⭐ (Best Choice)
- Cobalt blue glass bottle ⭐⭐⭐⭐☆
- Dark green glass bottle ⭐⭐⭐⭐☆
- Clear glass bottle (Only if stored in a dark cabinet)
- Stainless steel bottle (Suitable for travel)
Avoid storing rosemary oil in thin plastic bottles for long periods. Some plastics may react with oils over time or allow air to enter more easily.
Storage Tips for Maximum Freshness
To maintain the quality of your homemade rosemary oil, follow these simple practices:
- Store in a cool, dry place away from direct sunlight.
- Keep the bottle tightly closed after every use.
- Avoid exposing the oil to excessive heat or humidity.
- Use clean, dry hands or a dropper when dispensing the oil.
- Never allow water to enter the bottle, as moisture can encourage spoilage.
- Keep the oil away from windows, stoves, and bathrooms where temperature changes are frequent.
Pro Tip: A bedroom drawer, kitchen cabinet away from the stove, or a cool pantry are excellent places to store your rosemary oil.
Signs Your Storage Conditions Are Good
If your oil is stored correctly, you should notice:
- A pleasant herbal rosemary scent.
- A clear appearance without cloudiness.
- No visible mold or residue.
- A consistent texture and color.
- Freshness that lasts for several months.
How Long Does Rosemary Oil Last?
The shelf life of homemade rosemary oil depends on the quality of the ingredients, the type of carrier oil used, and how well the oil is stored. In general, rosemary-infused oil can remain fresh for several months when prepared and stored properly.
Here’s a general guideline:
| Carrier Oil | Approximate Shelf Life |
| Jojoba Oil | 12–24 months |
| Coconut Oil | 12–18 months |
| Olive Oil | 12–18 months |
| Argan Oil | 6–12 months |
| Sweet Almond Oil | 6–12 months |
| Grapeseed Oil | 3–6 months |
Note: The shelf life of your infused rosemary oil is limited by the carrier oil you choose. Always check the expiration date of the carrier oil before preparing your infusion.
How to Tell If Rosemary Oil Has Gone Bad
Even when stored carefully, homemade oils don’t last forever. Before each use, inspect the oil for any signs of spoilage.
Throw the Oil Away If You Notice:
- A sour, rancid, or unpleasant smell.
- Visible mold inside the bottle.
- Cloudiness that isn’t normal for the oil used.
- Foaming or bubbling, which may indicate contamination.
- A sticky or unusual texture.
- Significant color changes that weren’t present before.
Using spoiled oil may irritate your scalp, so it’s always safer to prepare a fresh batch if you’re unsure.
Can You Refrigerate Homemade Rosemary Oil?
Yes, refrigeration is an option, especially in hot or humid climates. Storing the oil in the refrigerator can help extend its freshness. However, some carrier oils such as coconut oil may solidify at lower temperatures.
If this happens, simply leave the bottle at room temperature for a few minutes before use. The oil will return to its normal consistency without losing its quality.
Best Practices to Extend Shelf Life
To keep your homemade rosemary oil fresh for as long as possible:
- Use high-quality, fresh ingredients.
- Ensure all herbs are completely dry before infusion.
- Sterilize jars and bottles before use.
- Store in a dark glass bottle.
- Keep away from sunlight and heat.
- Avoid introducing water into the bottle.
- Prepare small batches if you don’t use the oil frequently.
Storage Do’s and Don’ts
| Do’s | Don’ts |
| Store in a dark glass bottle | Store in direct sunlight |
| Keep the lid tightly closed | Leave the bottle open |
| Store in a cool, dry place | Keep near heat sources |
| Label the preparation date | Forget when the oil was made |
| Use clean droppers or spoons | Introduce water into the bottle |
| Check for spoilage before use | Use oil with a rancid smell |
Key Takeaway
Learning how to make rosemary oil for hair growth doesn’t end once the oil is prepared. Proper storage is essential to preserve its freshness, safety, and effectiveness. By using a dark glass bottle, keeping the oil in a cool, dry place, and checking it regularly for signs of spoilage, you can enjoy a high-quality homemade rosemary oil for months. Good storage habits ensure that every application delivers the best possible nourishment for your hair and scalp.
How to Use Rosemary Oil for Faster Hair Growth
Learning how to use rosemary oil for faster hair growth is just as important as making it correctly. Even a high-quality homemade rosemary oil will not provide the best results if it is applied inconsistently or in the wrong way. The key to getting the most from rosemary oil is using it regularly while following a healthy hair care routine.
Most people achieve the best results by applying rosemary oil two to three times per week. Regular use may help nourish the scalp, reduce dryness, strengthen the appearance of hair, and support healthier-looking growth over time. However, rosemary oil is not an instant solution. Hair grows slowly, so noticeable improvements often take several weeks or even a few months of consistent care.
For the best outcome, combine rosemary oil with a balanced diet, gentle shampoo, proper scalp hygiene, and minimal heat styling. Together, these habits create a healthier environment for stronger, shinier hair.
Expert Tip: Patience is essential when using rosemary oil. Consistent application, proper scalp care, and realistic expectations are far more important than applying large amounts of oil. Individual results vary based on genetics, lifestyle, hair type, and overall scalp health.
How to Use Rosemary Oil for Faster Hair Growth with a Scalp Massage
A scalp massage is one of the most effective ways to use rosemary oil for faster hair growth. Gentle massage helps spread the oil evenly across the scalp while stimulating blood circulation around the hair follicles. Although massage alone does not guarantee faster hair growth, it supports a healthier scalp environment where hair can thrive.
To begin, warm one to two teaspoons of homemade rosemary oil between your palms or place it in a small bowl. Part your hair into sections so the scalp is easy to reach. Apply a small amount of oil directly onto the scalp using your fingertips. Massage gently in small circular motions for five to ten minutes without scratching the skin. Leave the oil on for at least thirty minutes before washing it out with a mild sulfate-free shampoo. If your scalp feels comfortable, you may leave it on overnight for deeper conditioning.
Regular scalp massage offers several additional benefits. It helps distribute natural oils evenly, improves scalp hydration, reduces dryness, encourages relaxation, and allows the rosemary oil to coat the scalp more effectively.
Pro Tip: Always massage with the soft pads of your fingertips rather than your fingernails to avoid irritating the scalp.
How to Use Rosemary Oil for Faster Hair Growth as a Hair Mask
A rosemary oil hair mask is an excellent treatment for dry, damaged, or dull hair. Combining rosemary oil with moisturizing ingredients provides deep nourishment for both the scalp and hair strands while improving softness and shine.
Mix two tablespoons of homemade rosemary oil with one tablespoon of coconut oil, one tablespoon of plain yogurt, and one teaspoon of honey until the mixture becomes smooth. Apply the mask from your scalp to the ends of your hair, making sure every section is evenly coated. Cover your hair with a shower cap and leave the treatment on for thirty to forty-five minutes. Rinse thoroughly with lukewarm water and wash with a gentle shampoo if necessary.
Using this mask once a week may help improve moisture levels, reduce frizz, soften rough hair, and leave strands looking healthier and smoother. It is especially beneficial for dry, chemically treated, curly, or damaged hair that needs extra nourishment.
How to Use Rosemary Oil for Faster Hair Growth with Shampoo or Conditioner
If you prefer a quick and simple routine, you can add rosemary oil to the amount of shampoo or conditioner you use during each wash. This method allows you to enjoy the benefits of rosemary oil without adding another step to your hair care routine.
Place your usual amount of shampoo or conditioner in your palm and mix in three to five drops of homemade rosemary oil. Blend the mixture with your fingers before applying it to your scalp and hair. Massage gently for a few minutes and rinse thoroughly.
Avoid adding rosemary oil directly into the entire shampoo bottle because it may affect the product’s consistency and shorten its shelf life.
This method is ideal for beginners, busy schedules, and anyone looking for an easy way to include rosemary oil in their regular hair care routine.
How to Use Rosemary Oil for Faster Hair Growth: Leave-In vs. Wash-Out Treatment
Many people wonder whether rosemary oil should stay on the hair overnight or be washed out after a short treatment. The answer depends on your hair type, scalp condition, and personal preference.
A leave-in treatment allows rosemary oil to remain on the scalp for several hours or overnight. This option works well for dry scalps, thick hair, curly hair, and extremely dry hair because it provides longer-lasting hydration and nourishment.
A wash-out treatment involves leaving the oil on for thirty to sixty minutes before shampooing. This method is generally better for oily scalps, fine hair, sensitive skin, and people who prefer a lightweight routine. It also reduces greasiness while still allowing enough time for the oil to condition the scalp.
If you are using homemade rosemary oil for the first time, begin with a wash-out treatment. This allows you to see how your scalp responds before trying overnight applications. Performing a patch test before full use is also recommended, especially if you have sensitive skin.
How to Use Rosemary Oil for Faster Hair Growth: Rosemary Water vs. Rosemary Oil
Although rosemary water and rosemary oil come from the same herb, they serve different purposes in a healthy hair care routine.
Rosemary water is made by boiling fresh or dried rosemary leaves in water. It has a light texture and works well as a daily leave-in scalp mist that refreshes the scalp without making hair greasy. People with oily scalps often prefer rosemary water because it feels lightweight and absorbs quickly.
Rosemary oil is prepared by infusing rosemary leaves into a carrier oil such as coconut, olive, or jojoba oil. It provides richer nourishment, helps reduce dryness, and is better suited for scalp massages and weekly deep-conditioning treatments.
Many people combine both products in their routine by using rosemary water as a daily scalp spray and rosemary oil two or three times each week for deeper nourishment. This balanced approach helps keep the scalp hydrated while providing long-lasting moisture and conditioning.
Best Way to Use Rosemary Oil for Faster Hair Growth
The best way to use rosemary oil for faster hair growth is to make it a regular part of your weekly hair care routine rather than expecting immediate results. Consistent application two to three times each week, combined with gentle scalp massage, healthy eating habits, proper hydration, and careful hair care, creates the ideal conditions for healthier-looking hair over time.
Whether you choose a relaxing scalp massage, a nourishing hair mask, or a simple shampoo boost, regular use is the key to success. With patience and proper application, homemade rosemary oil can help support a healthier scalp, strengthen the appearance of hair, improve softness and shine, and promote naturally healthier-looking hair in the months ahead.
5 DIY Rosemary Oil Recipes for Different Hair Types

One of the biggest advantages of learning how to make rosemary oil for hair growth is that you can customize the recipe according to your hair’s specific needs. Every hair type is different, and using the right combination of rosemary and a suitable carrier oil can help address concerns such as dryness, breakage, frizz, excess oil, or scalp irritation.
Although rosemary is the star ingredient in this recipe, pairing it with carefully selected nourishing oils can make your homemade blend more versatile and better suited to your individual hair care needs. For example, castor oil may help improve the richness of the blend, while coconut oil can provide deep moisture for dry or damaged hair. Likewise, argan oil is a lightweight option that may help smooth frizz and add shine without leaving the hair feeling overly heavy. In addition, peppermint essential oil can provide a refreshing cooling sensation during scalp massage when it is properly diluted. Furthermore, each of these oils offers different characteristics, so choosing the right combination depends on your hair type, scalp condition, and personal preferences.
Therefore, rather than adding oils simply because they are popular, select ingredients that complement your specific hair care goals. As a result, your homemade rosemary oil can become more balanced, easier to apply, and more enjoyable to use on a regular basis. Ultimately, combining rosemary with suitable companion oils such as castor oil, coconut oil, argan oil, or properly diluted peppermint essential oil can help create a personalized hair care routine that supports healthier-looking hair and a comfortable, well-maintained scalp over time. These DIY recipes are easy to prepare, affordable, and suitable for regular use.
Expert Tip: Always use 100% pure, cold-pressed carrier oils whenever possible. High-quality ingredients help you get the most out of your homemade rosemary oil.
Basic Rosemary Hair Oil Recipe
If you’re making how to make rosemary oil for hair growth at home for the first time, start with this simple recipe. It is suitable for most hair types and serves as a great all-purpose treatment for scalp nourishment and healthy-looking hair.
Ingredients
- 1 cup (240 ml) olive oil or jojoba oil
- 2–4 tablespoons dried rosemary
- 1 clean glass jar
- Dark glass storage bottle
Instructions
- Add the dried rosemary to the glass jar.
- Pour the carrier oil over the rosemary until fully submerged.
- Seal the jar tightly.
- Let it infuse for 2–4 weeks, shaking gently every few days.
- Strain the oil using a cheesecloth or fine mesh strainer.
- Store the finished oil in a dark glass bottle.
Best For
- Normal hair
- Beginners
- Weekly scalp massages
- General hair maintenance
Benefits
- Supports a healthy scalp
- Helps improve hair softness
- Adds natural shine
- Easy to prepare
- Suitable for regular use
Rosemary and Castor Oil for Hair Growth
Castor oil is well known for its thick consistency and deeply nourishing properties. When combined with rosemary, castor oil creates a rich, nourishing blend that may help support stronger-looking hair and reduce the appearance of breakage over time. In addition, its thick consistency can help coat the hair strands, which may improve softness and reduce moisture loss. Furthermore, when used as part of a consistent hair care routine, this combination may contribute to healthier-looking hair while supporting overall scalp care. However, because castor oil is naturally very thick and viscous, applying it on its own can be difficult.
Therefore, mixing it with a lighter carrier oil such as jojoba, sweet almond, grapeseed, or argan oil can make the blend much easier to apply and distribute evenly throughout the scalp and hair. Moreover, a lighter oil can improve spreadability without significantly reducing the nourishing properties of the mixture. Likewise, it may leave the hair feeling less heavy and easier to wash out after treatment. As a result, the oil blend becomes more comfortable to use, more practical for regular application, and better suited to a wider range of hair types. Ultimately, balancing castor oil with a lighter carrier oil helps create a smoother, more manageable rosemary oil blend that fits naturally into a consistent hair care routine.
Ingredients
- 2 tablespoons homemade rosemary oil
- 1 tablespoon castor oil
- 1 tablespoon jojoba oil (optional for a lighter texture)
Instructions
- Mix all the oils in a clean bowl.
- Apply directly to the scalp.
- Massage gently for 5–10 minutes.
- Leave on for 1–2 hours or overnight.
- Wash with a gentle shampoo.
Best For
- Hair thinning
- Weak hair
- Dry scalp
- Brittle hair
Benefits
- Helps nourish hair roots
- Improves moisture retention
- Supports stronger-looking hair
- Reduces dryness
- Adds thickness to the hair’s appearance
Pro Tip: Because castor oil is thick, use a small amount to avoid heavy buildup on the scalp.
Rosemary and Coconut Oil for Dry Hair
If your hair feels dry, rough, or lacks shine, coconut oil is one of the best carrier oils to combine with rosemary. Coconut oil penetrates the hair shaft better than many other oils, helping to reduce protein loss and improve moisture retention.
This recipe is especially beneficial during colder months or if you frequently use heat styling tools.
Ingredients
- 3 tablespoons homemade rosemary oil
- 2 tablespoons virgin coconut oil
Instructions
- Warm the mixture slightly if the coconut oil has solidified.
- Mix until smooth.
- Apply from the scalp to the ends of your hair.
- Leave on for 45–60 minutes.
- Wash thoroughly with a mild shampoo.
Best For
- Dry hair
- Frizzy hair
- Thick hair
- Curly hair
Benefits
- Deep hydration
- Reduces frizz
- Improves softness
- Adds natural shine
- Helps protect against dryness
Rosemary and Argan Oil for Damaged Hair
Argan oil, often referred to as “liquid gold,” is rich in Vitamin E, antioxidants, and essential fatty acids. It is widely used to improve the appearance of damaged, color-treated, or heat-styled hair.
When paired with rosemary oil, argan oil creates a lightweight treatment that nourishes both the scalp and hair without feeling overly greasy.
Ingredients
- 2 tablespoons homemade rosemary oil
- 2 tablespoons pure argan oil
Instructions
- Combine both oils in a clean glass bowl.
- Mix well.
- Apply evenly to the scalp and hair lengths.
- Massage gently for several minutes.
- Leave on for 30–60 minutes.
- Wash with a sulfate-free shampoo.
Best For
- Damaged hair
- Color-treated hair
- Heat-damaged hair
- Split ends
- Dull hair
Benefits
- Restores softness
- Improves shine
- Helps smooth rough hair
- Reduces frizz
- Supports healthier-looking hair
Rosemary and Peppermint Oil for Scalp Care
Peppermint essential oil creates a refreshing cooling sensation that many people enjoy during scalp massages. In addition, when it is properly diluted with homemade rosemary oil and a suitable carrier oil, it can become a pleasant addition to a regular scalp care routine. Furthermore, its cooling effect may leave the scalp feeling refreshed after application, which many people find relaxing during massage. Moreover, combining peppermint essential oil with rosemary oil can create a more enjoyable sensory experience while supporting an overall hair care regimen. However, because peppermint essential oil is highly concentrated, it should always be diluted before it comes into contact with the scalp.
Likewise, performing a patch test before the first use is recommended, especially if you have sensitive skin or a history of reactions to essential oils. As a result, you can reduce the risk of irritation while using the blend more confidently. Ultimately, when used safely, in appropriate amounts, and as part of a consistent hair care routine, peppermint essential oil can complement homemade rosemary oil and contribute to a refreshing, comfortable scalp care experience.
Because peppermint essential oil is highly concentrated, only a few drops are needed.
Ingredients
- 2 tablespoons homemade rosemary oil
- 2–3 drops peppermint essential oil
Instructions
- Mix the peppermint oil into the rosemary oil.
- Apply directly to the scalp.
- Massage gently for 5 minutes.
- Leave on for 30–45 minutes.
- Wash with a mild shampoo.
Best For
- Oily scalp
- Mild scalp discomfort
- Weekly scalp massages
- Refreshing hair treatments
Benefits
- Leaves the scalp feeling fresh
- Helps reduce excess oil
- Enhances the massage experience
- Complements rosemary oil well
- Lightweight and easy to use
Important: Never apply peppermint essential oil directly to the scalp without diluting it in a carrier oil.
DIY Rosemary Oil Recipes at a Glance
| Recipe | Best For | Main Benefits |
| Basic Rosemary Hair Oil | All hair types | General scalp nourishment and shine |
| Rosemary + Castor Oil | Hair thinning | Strengthens hair and reduces breakage |
| Rosemary + Coconut Oil | Dry hair | Deep hydration and softness |
| Rosemary + Argan Oil | Damaged hair | Repairs damage and controls frizz |
| Rosemary + Peppermint Oil | Oily scalp | Refreshes and balances the scalp |
Which DIY Recipe Should You Choose?
Choosing the right recipe depends on your hair’s unique needs.
- Dry or coarse hair: Rosemary + Coconut Oil
- Damaged or chemically treated hair: Rosemary + Argan Oil
- Weak or thinning hair: Rosemary + Castor Oil
- Oily scalp: Rosemary + Peppermint Oil
- Normal hair: Basic Rosemary Hair Oil
You can also rotate between recipes depending on seasonal changes, styling habits, or your scalp’s condition.
Key Takeaway: Learning how to make rosemary oil for hair growth gives you the flexibility to create personalized treatments for every hair type. By selecting the right carrier oil and following a consistent routine, you can support healthier-looking hair, improve scalp condition, and enjoy a natural, customizable approach to hair care.
Best Carrier Oil for Your Hair Type
When learning how to make rosemary oil for hair growth, choosing the right carrier oil is just as important as selecting high-quality rosemary. While rosemary provides the herbal properties, the carrier oil serves as the foundation of the infusion by safely diluting the rosemary and delivering it evenly across the scalp and hair. In addition, carrier oils contain their own beneficial nutrients, including vitamins, antioxidants, and essential fatty acids that help nourish and protect the hair.
Therefore, selecting a carrier oil that matches your hair type can improve both the comfort and effectiveness of your homemade rosemary oil. Rather than choosing the first oil available, consider your scalp condition, hair texture, and overall hair care goals.
Why Choosing the Right Carrier Oil Matters
A carrier oil does much more than dilute rosemary essential oil. It also helps moisturize the scalp, reduce friction during application, improve the spreadability of the oil, and support healthy-looking hair. Furthermore, each carrier oil has a unique composition, which means it offers different benefits depending on your hair’s needs.
Consequently, using a carrier oil that complements your hair type can help you create a more balanced and effective rosemary oil blend.
Match Your Carrier Oil to Your Hair Type
There is no single carrier oil that works best for everyone. Instead, the ideal choice depends on your individual hair texture and scalp condition.
For example, jojoba oil and grapeseed oil are lightweight options that absorb quickly, making them suitable for fine or oily hair. By contrast, coconut oil, olive oil, and avocado oil provide richer hydration and are often preferred for dry, coarse, or damaged hair.
Likewise, people with curly, coily, or textured hair may benefit from nourishing oils that help retain moisture, reduce frizz, and improve softness. Meanwhile, individuals with a sensitive scalp should choose gentle carrier oils that are less likely to cause irritation.
Consider Your Hair Goals
In addition to hair type, think about your primary hair care goals before selecting a carrier oil. For instance, if your priority is adding moisture, richer oils may be a better fit. On the other hand, if you prefer a lightweight finish with minimal residue, fast-absorbing oils are generally a more suitable choice.
Similarly, if your hair is frequently exposed to heat styling or environmental damage, choosing a nutrient-rich carrier oil may help improve softness and reduce the appearance of dryness over time.
Carrier Oil Selection Guide
The guide below compares the most popular carrier oils and explains which hair types they are generally best suited for. As a result, you can choose an oil that complements your hair’s specific needs while creating a well-balanced homemade rosemary oil.
Expert Tip: The best carrier oil is the one that suits your hair type and scalp condition. Although rosemary is the featured ingredient, the carrier oil plays an equally important role in moisturizing the hair, supporting scalp comfort, and improving the overall performance of your homemade rosemary oil. Therefore, selecting the right carrier oil is one of the most important steps in making a high-quality rosemary hair oil.
For Dry Hair
Dry hair often lacks moisture, feels rough to the touch, and is more likely to develop split ends and frizz. It may also become brittle due to excessive heat styling, chemical treatments, or environmental damage. Therefore, people with dry hair need carrier oils that provide deep hydration and help lock in moisture.
The best carrier oils for dry hair are those rich in nourishing fatty acids and vitamins. These oils coat the hair strands, reduce moisture loss, and improve softness without making the hair feel overly heavy when used in the right amount.
Best Carrier Oils for Dry Hair
- Coconut Oil – Deeply penetrates the hair shaft and helps reduce protein loss.
- Olive Oil – Provides intense moisture and improves hair elasticity.
- Avocado Oil – Rich in Vitamins A, D, and E for dry, damaged hair.
- Sweet Almond Oil – Softens hair while reducing frizz and roughness.
Benefits for Dry Hair
- Deep hydration
- Helps reduce split ends
- Improves softness and smoothness
- Controls frizz
- Restores natural shine
- Makes hair easier to manage
Expert Tip: Warm your rosemary oil slightly before applying it to dry hair. Warm oil spreads more evenly and can improve the overall treatment experience.
For Oily Hair
Many people with oily hair avoid using oils altogether because they worry about making their hair greasier. However, the right carrier oil can actually help maintain a healthier balance. Lightweight oils absorb quickly and don’t leave a heavy residue, making them an excellent choice for oily scalps.
When preparing how to make rosemary oil for hair growth, choose carrier oils that are light, non-comedogenic, and easy to wash out.
Best Carrier Oils for Oily Hair
- Jojoba Oil – Closely resembles the scalp’s natural sebum and absorbs quickly.
- Grapeseed Oil – Extremely lightweight and rich in antioxidants.
- Rosehip Oil – Helps moisturize without feeling greasy.
Benefits for Oily Hair
- Lightweight hydration
- Helps balance excess oil
- Doesn’t weigh hair down
- Leaves the scalp feeling fresh
- Suitable for frequent use
Pro Tip: Apply rosemary oil mainly to the scalp rather than the entire hair length if your hair becomes oily quickly.
For Curly Hair
Curly hair naturally loses moisture more easily because the scalp’s natural oils have a harder time traveling along the curls. As a result, curly hair often requires richer carrier oils that provide long-lasting hydration and improve curl definition.
A nourishing rosemary oil blend can help keep curls soft, manageable, and less prone to breakage.
Best Carrier Oils for Curly Hair
- Coconut Oil
- Sweet Almond Oil
- Argan Oil
- Avocado Oil
Benefits for Curly Hair
- Deep nourishment
- Better curl definition
- Reduced frizz
- Improved elasticity
- Softer, shinier curls
- Easier detangling
Expert Recommendation: Apply rosemary oil to slightly damp curls after washing to help seal in moisture and reduce frizz.
For Thin or Fine Hair
Thin or fine hair requires a different approach. Heavy oils can flatten the hair, making it appear limp and greasy. Therefore, lightweight carrier oils are the best option because they nourish the scalp without weighing down delicate hair strands.
When making how to make rosemary oil for hair growth at home, use a small amount of oil and focus on the scalp rather than saturating the entire hair length.
Best Carrier Oils for Thin or Fine Hair
- Jojoba Oil
- Grapeseed Oil
- Argan Oil
Benefits for Thin Hair
- Lightweight nourishment
- Doesn’t flatten the hair
- Improves softness
- Adds healthy-looking shine
- Easy to wash out
- Comfortable for regular use
Pro Tip: Fine hair usually needs less oil than thick hair. Start with a small amount and increase only if necessary.
For Hair Growth
If your main goal is to support healthier hair growth, choose carrier oils that work well alongside rosemary while nourishing the scalp and strengthening the hair shaft.
Although no carrier oil can guarantee faster hair growth, the right combination can improve scalp health, reduce dryness, and minimize breakage—important factors for maintaining longer, stronger hair over time.
Best Carrier Oils for Hair Growth
1. Jojoba Oil
- Lightweight
- Balances scalp oil
- Excellent for regular scalp massages
2. Coconut Oil
- Deeply nourishes hair
- Helps reduce protein loss
- Suitable for dry hair
3. Castor Oil
- Thick consistency
- Commonly used in DIY hair treatments
- Best when mixed with lighter oils
4. Argan Oil
- Rich in Vitamin E
- Helps repair damaged hair
- Improves shine and softness
5. Sweet Almond Oil
- Lightweight hydration
- Helps reduce dryness
- Smooths rough hair
Comparison of the Best Carrier Oils
| Carrier Oil | Best For | Texture | Main Benefits |
| Coconut Oil | Dry Hair | Medium | Deep moisture and strength |
| Jojoba Oil | Oily Hair | Light | Balances scalp oil |
| Argan Oil | Damaged Hair | Light | Repairs and smooths hair |
| Castor Oil | Hair Growth Routine | Thick | Strengthens and nourishes |
| Sweet Almond Oil | Curly Hair | Medium | Softness and shine |
| Grapeseed Oil | Fine Hair | Very Light | Lightweight hydration |
| Olive Oil | Thick Hair | Heavy | Intense conditioning |
How to Choose the Right Carrier Oil
If you’re unsure which oil to use, ask yourself these simple questions:
- Is your scalp dry or oily?
- Do you have straight, curly, or wavy hair?
- Is your hair damaged from heat or coloring?
- Do you prefer lightweight or richer oils?
- Will you use the oil weekly or more frequently?
Answering these questions will help you select a carrier oil that fits your hair’s needs and makes your homemade rosemary oil more effective.
Key Takeaway
Choosing the right carrier oil is a crucial step in how to make rosemary oil for hair growth. While rosemary provides the herbal infusion, the carrier oil plays an equally important role because it determines how effectively the blend moisturizes, protects, and nourishes your hair and scalp. Therefore, selecting the right carrier oil is just as important as choosing high-quality rosemary. Moreover, every carrier oil has a unique composition, which means each one offers different benefits depending on your hair type and scalp condition. For example, some oils provide deep hydration, whereas others are lighter and absorb more quickly without leaving a greasy feel.
By matching the carrier oil to your specific hair type whether it is dry, oily, curly, fine, damaged, or color-treated you can create a customized rosemary oil blend that better suits your individual needs. In addition, choosing an appropriate carrier oil can help improve moisture retention, reduce frizz, support scalp comfort, and enhance overall hair manageability. Likewise, selecting an oil that complements your hair texture can make regular application more comfortable and practical.
Furthermore, using a blend tailored to your hair’s needs may help minimize unnecessary oil buildup while maximizing hydration where it is needed most. As a result, your homemade rosemary oil is more likely to support healthier-looking hair and a well-balanced scalp over time. Ultimately, rather than choosing a carrier oil simply because it is popular, base your decision on your hair’s unique characteristics and long-term care goals. Consequently, a personalized blend can provide more consistent and satisfying results as part of your regular hair care routine. Consistent use, combined with proper hair care habits, will help you get the most from your homemade rosemary oil.
Common Mistakes to Avoid When Making Rosemary Oil
Learning how to make rosemary oil for hair growth is relatively simple. However, even small mistakes can affect the quality, safety, and effectiveness of your homemade oil. For example, using poor-quality ingredients, overheating the mixture, or storing the finished oil incorrectly can reduce its freshness and stability. As a result, the oil may lose some of its beneficial properties, spoil more quickly, or become unsuitable for use.
Fortunately, these mistakes are easy to avoid. By following proper preparation methods and paying attention to each step, you can create a high-quality rosemary oil that remains fresh and reliable for regular use.
Use High-Quality Ingredients
The quality of your finished oil begins with the ingredients you choose. Therefore, select clean, high-quality dried rosemary and a fresh carrier oil such as jojoba oil, olive oil, coconut oil, sweet almond oil, or argan oil. In contrast, old herbs or rancid carrier oils can reduce the quality and shelf life of the final product.
Avoid Excessive Heat
Although gentle heat can speed up the infusion process, excessive temperatures may damage the carrier oil and reduce the quality of the herbal infusion. Consequently, always warm the oil over low heat and avoid allowing it to boil. A slow, controlled infusion generally produces better results than rushing the process.
Keep Equipment Clean and Dry
Before preparing rosemary oil, wash and completely dry all jars, bottles, lids, strainers, and utensils. Otherwise, moisture or contamination can encourage mold, yeast, or bacterial growth. Moreover, using sterilized equipment helps extend the shelf life of your homemade oil.
Store the Oil Correctly
Proper storage is just as important as proper preparation. After straining the oil, transfer it into a clean, airtight dark glass bottle. Then, keep it in a cool, dry place away from direct sunlight and heat. As a result, the oil is more likely to remain stable and maintain its quality for a longer period.
Don’t Rush the Infusion Process
Many beginners expect immediate results and shorten the infusion time. However, rosemary needs sufficient time to release its natural compounds into the carrier oil. Therefore, whether you choose the cold infusion method or a gentle heat infusion, follow the recommended process instead of rushing it.
Expert Tip
The quality of homemade rosemary oil depends far more on careful preparation, proper dilution, and correct storage than on using excessive amounts of rosemary. Likewise, rushing the infusion process rarely produces better results. Instead, allow the herbs to infuse gradually, monitor the oil carefully, and follow each step consistently. Ultimately, patience and attention to detail help produce a cleaner, longer-lasting, and more reliable rosemary oil for your hair care routine.
Using Wet Rosemary
One of the most common and most serious mistakes is using fresh rosemary that still contains moisture. While fresh rosemary is rich in natural compounds, any remaining water on the leaves can become trapped inside the oil. Since oil and water don’t mix, this moisture creates an environment where mold and bacteria may grow.
Many beginners wash fresh rosemary and immediately place it into oil. Unfortunately, this simple mistake can spoil the entire batch within a short period.
Why Wet Rosemary Is a Problem
- Increases the risk of mold growth
- Reduces the shelf life of the oil
- Can cause unpleasant odors
- May contaminate the entire batch
- Makes the oil unsafe to use
How to Avoid This Mistake
- Wash fresh rosemary thoroughly if needed.
- Allow it to air-dry completely for 24–48 hours before using it.
- Alternatively, use dried rosemary, which is the safest and most reliable option for homemade infusions.
Best Practice: If you’re following how to make rosemary oil with dried rosemary for hair, you significantly reduce the chances of spoilage because dried rosemary contains very little moisture.
Overheating the Oil
Heat can certainly speed up the infusion process; however, using too much heat may do more harm than good. Although gentle warming encourages the rosemary to release its beneficial plant compounds into the carrier oil, excessive temperatures can gradually degrade some of those naturally occurring compounds. Consequently, prolonged exposure to high heat may reduce the overall quality, aroma, and effectiveness of your homemade rosemary oil. In addition, carrier oils themselves contain beneficial fatty acids and antioxidants that can also deteriorate when overheated. Therefore, controlling the temperature throughout the infusion process is essential for producing a high-quality final product.
For this reason, boiling, frying, or allowing the oil to smoke is neither necessary nor recommended. Instead, the goal is to warm the oil slowly and gently over low heat so the rosemary can infuse without damaging its naturally occurring compounds. Meanwhile, stirring the mixture occasionally helps distribute the heat more evenly and prevents the herbs from settling at the bottom of the pan. Likewise, monitoring the temperature throughout the process helps protect both the rosemary and the carrier oil from unnecessary heat damage. As a result, the infusion remains more stable and retains more of its desirable characteristics. Ultimately, using gentle, controlled heat produces a cleaner, fresher, and higher-quality rosemary-infused oil that is better suited for regular hair care use.
Signs the Oil Is Too Hot
- The oil begins to smoke.
- Rapid bubbling appears.
- The rosemary turns dark brown or black.
- A burnt smell develops.
Safe Heating Tips
- Always use low heat.
- Keep the oil warm, not boiling.
- Heat for 30–60 minutes only if using the quick infusion method.
- Stir occasionally to distribute the heat evenly.
Ideal Temperature Guide
| Method | Recommended Temperature | Approximate Time |
| Slow Infusion | No direct heat | 2–4 weeks |
| Quick Heat Infusion | Low, gentle heat | 30–60 minutes |
Expert Tip: If you can comfortably touch the outside of the saucepan without it becoming extremely hot, you’re usually within a gentle heating range.
Choosing the Wrong Carrier Oil
Another mistake many people make is choosing a carrier oil based only on popularity instead of considering their hair type. Every carrier oil has different properties, and selecting the wrong one can leave your hair feeling greasy, heavy, or under-moisturized.
For example, coconut oil is often an excellent choice for dry, thick, or damaged hair because it helps reduce protein loss and supports long-lasting moisture retention. However, due to its richer texture, it may feel too heavy for people with fine hair or naturally oily scalps. In contrast, jojoba oil is lightweight and closely resembles the scalp’s natural sebum. As a result, it absorbs more quickly and is less likely to leave the hair feeling greasy. Moreover, jojoba oil can help maintain the scalp’s natural moisture balance without adding excessive weight to the hair. Likewise, it is often well suited for people with fine hair who want hydration without sacrificing volume.
On the other hand, individuals with very dry or coarse hair may benefit from a richer carrier oil, such as coconut or olive oil, because these oils provide deeper nourishment. Therefore, choosing the right carrier oil should depend on your hair type, scalp condition, and personal preferences rather than simply following popular trends. Ultimately, matching the carrier oil to your specific needs can improve both the comfort of your routine and the overall performance of your homemade rosemary oil. Consequently, you are more likely to enjoy consistent, long-term benefits for your scalp and hair.
Common Carrier Oil Mistakes
- Using thick oils on fine hair
- Choosing lightweight oils for extremely dry hair
- Using low-quality or refined oils
- Ignoring the oil’s expiration date
- Mixing incompatible oils without understanding their benefits
How to Choose Correctly
| Hair Type | Recommended Carrier Oil |
| Dry Hair | Coconut Oil, Olive Oil |
| Oily Hair | Jojoba Oil, Grapeseed Oil |
| Curly Hair | Sweet Almond Oil, Coconut Oil |
| Damaged Hair | Argan Oil |
| Fine Hair | Grapeseed Oil, Jojoba Oil |
Pro Tip: Whenever possible, choose cold-pressed, unrefined carrier oils. They generally retain more natural nutrients than highly processed oils.
Storing the Oil Incorrectly
Even if you’ve mastered how to make rosemary oil for hair growth, improper storage can shorten the oil’s shelf life and reduce its effectiveness. Exposure to light, heat, moisture, and air can cause the oil to oxidize more quickly, leading to rancidity.
Many people leave their homemade oil near a sunny window or in a humid bathroom, both of which are poor storage locations.
Storage Mistakes to Avoid
- Using clear plastic bottles
- Leaving the lid loosely closed
- Storing near direct sunlight
- Keeping the bottle close to heat sources
- Allowing water to enter the bottle
- Forgetting to label the preparation date
Correct Storage Practices
- Store the oil in an amber or cobalt blue glass bottle.
- Keep it in a cool, dry cabinet.
- Close the lid tightly after every use.
- Use clean, dry droppers or spoons.
- Label the bottle with the preparation date.
Good Storage vs. Bad Storage
| Good Storage Habits | Poor Storage Habits |
| Dark glass bottle | Clear plastic bottle |
| Cool, dry cabinet | Sunny windowsill |
| Airtight lid | Loose or open lid |
| Dry utensils | Wet hands or spoons |
| Labeled bottle | No preparation date |
Important: If your rosemary oil develops a sour smell, visible mold, or unusual cloudiness, discard it immediately and prepare a fresh batch.
Bonus Mistakes Beginners Often Make
Besides the major mistakes above, here are a few additional errors that can affect the quality of your homemade rosemary oil:
- Using expired carrier oils
- Not straining the oil properly
- Filling the jar too tightly with herbs
- Using dirty jars or utensils
- Applying excessive amounts of oil
- Expecting overnight hair growth
- Skipping patch tests before first use
- Using rosemary essential oil directly on the scalp without dilution
Avoiding these small mistakes can make a significant difference in both the safety and effectiveness of your rosemary oil.
Quick Checklist Before You Make Rosemary Oil
Use completely dry rosemary
Choose a high-quality carrier oil
Sterilize jars and bottles
Avoid overheating the oil
Store in a dark glass bottle
Keep away from sunlight and moisture
Label the preparation date
Perform a patch test before use
Key Takeaway
Understanding how to make rosemary oil for hair growth is not just about following a recipe it’s also about avoiding the common mistakes that can reduce the oil’s quality and effectiveness. By using dry rosemary, applying gentle heat, selecting the right carrier oil, and storing your homemade oil properly, you’ll create a safe, long-lasting product that supports a healthy scalp and stronger-looking hair. Paying attention to these details ensures that every batch delivers the best possible results as part of your natural hair care routine.
Does Homemade Rosemary Oil Really Help Hair Growth After You Make Rosemary Oil for Hair Growth?
After learning how to make rosemary oil for hair growth, many people naturally wonder whether it actually works. Current research and traditional use suggest that homemade rosemary oil may help support healthier-looking hair when it is prepared correctly, diluted with a suitable carrier oil, and applied consistently. However, it is important to understand that rosemary oil is not a miracle cure for every type of hair loss, nor does it deliver overnight results.
Instead, rosemary oil works by supporting a healthier scalp environment. A healthy scalp is essential for maintaining strong hair follicles and reducing unnecessary hair breakage. When used as part of a balanced hair care routine, homemade rosemary oil may improve scalp comfort, enhance hair softness, and support healthier-looking hair over time.
While many people report positive experiences, individual results vary depending on genetics, age, overall health, nutrition, hormone levels, scalp condition, and daily hair care habits. Therefore, patience and consistency remain the most important factors for achieving noticeable improvements.
Scientific Evidence Behind How to Make Rosemary Oil for Hair Growth
Interest in how to make rosemary oil for hair growth has increased because of scientific research investigating rosemary’s effects on hair health. One of the most frequently referenced clinical studies, published in 2015, compared rosemary oil with 2% minoxidil for androgenetic alopecia. After six months of regular use, both groups showed similar improvements in hair count, while the rosemary oil group experienced less scalp itching.
Although this research does not prove that homemade rosemary oil replaces medical treatments, it suggests that rosemary oil may be a promising natural ingredient for supporting healthy hair when used consistently as part of a complete hair care routine.
How Homemade Rosemary Oil for Hair Growth Supports a Healthy Scalp
One reason many people learn how to make rosemary oil for hair growth is because rosemary contains naturally occurring antioxidant and anti-inflammatory compounds. These compounds may help protect the scalp from oxidative stress while supporting overall scalp comfort.
Researchers also believe rosemary oil may encourage healthy blood circulation around the hair follicles. Better circulation helps deliver oxygen and nutrients that support normal hair function. In addition, regular application may reduce scalp dryness, improve hair softness, minimize breakage, and leave hair looking shinier and healthier.
Although these benefits are encouraging, rosemary oil works best when combined with gentle hair care practices, proper nutrition, and consistent scalp care.
Understanding Hair Growth Before You Make Rosemary Oil for Hair Growth
Understanding the natural hair growth cycle helps set realistic expectations after you make rosemary oil for hair growth. Hair grows in three stages.
| Hair Growth Phase | What Happens |
|---|---|
| Anagen (Growth Phase) | Hair actively grows from the follicle and may remain in this stage for several years. |
| Catagen (Transition Phase) | Hair growth slows while the follicle prepares for its resting stage. |
| Telogen (Resting Phase) | Older hairs naturally shed, allowing new hairs to grow. |
Because healthy hair grows only about 1–1.5 cm per month, no natural oil can produce instant results. Most people notice gradual improvements after 8–12 weeks, while more visible changes often appear after three to six months of consistent use.
Benefits of How to Make Rosemary Oil for Hair Growth
When you make rosemary oil for hair growth and use it regularly, it may provide several supportive benefits for your scalp and hair. Consistent application may help maintain a healthier scalp, reduce mild dryness, improve hair softness, minimize breakage, strengthen weak strands, enhance natural shine, and promote fuller-looking hair over time.
These benefits develop gradually and are most noticeable when rosemary oil becomes part of a complete hair care routine rather than a stand-alone treatment.
Limitations of How to Make Rosemary Oil for Hair Growth
Although learning how to make rosemary oil for hair growth is worthwhile, understanding its limitations is equally important. Homemade rosemary oil cannot regrow hair overnight, reverse every type of hair loss, replace professional medical treatment for hormonal or genetic conditions, or guarantee identical results for every individual.
If you notice sudden, severe, or patchy hair loss, consult a qualified dermatologist or healthcare professional for an accurate diagnosis before relying only on home remedies.
How to Get the Best Results After You Make Rosemary Oil for Hair Growth
The best results after you make rosemary oil for hair growth come from consistency rather than frequent application. Apply the oil two to three times each week, massage it gently into the scalp, and combine it with a healthy lifestyle.
A balanced diet rich in protein, iron, zinc, biotin, and vitamins, together with adequate hydration, quality sleep, stress management, and gentle hair care habits, creates the ideal conditions for healthier-looking hair. Avoid excessive heat styling and harsh chemical treatments whenever possible to reduce unnecessary damage.
Ultimately, homemade rosemary oil is most effective when viewed as one part of a long-term hair care routine. With patience and regular use, it can help maintain a healthier scalp and support stronger, shinier, and healthier-looking hair over time.
Safety Tips Before Using Rosemary Oil
Learning how to make rosemary oil for hair growth is only part of the process. Equally important is using the oil safely and responsibly. After all, even high-quality homemade rosemary oil should be applied correctly to help reduce the risk of irritation while supporting a healthy hair care routine.
Moreover, rosemary essential oil is highly concentrated and should always be diluted with a suitable carrier oil before it comes into contact with the scalp. Although rosemary is a natural plant, natural ingredients are not automatically suitable for everyone. Instead, factors such as skin sensitivity, allergies, existing scalp conditions, age, and certain medical conditions can all influence how your skin responds.
Perform a Patch Test Before Every New Batch
Before applying rosemary oil to your scalp, perform a patch test, especially if you are using a new recipe, a different carrier oil, or a new brand of rosemary essential oil.
First, apply a small amount of diluted oil to the inside of your forearm or behind your ear. Then, wait at least 24 hours and observe the area for signs of redness, itching, burning, swelling, or irritation.
If no reaction occurs, you can proceed with normal use. However, if you experience discomfort or an allergic reaction, discontinue use immediately and wash the area thoroughly with mild soap and water. If symptoms persist or worsen, consult a qualified healthcare professional.
Always Dilute Rosemary Essential Oil
One of the most important safety rules is never apply rosemary essential oil directly to the scalp. Instead, mix it with a carrier oil such as jojoba oil, coconut oil, olive oil, sweet almond oil, or argan oil.
Proper dilution helps reduce the risk of skin irritation while allowing the oil to spread more evenly across the scalp. Additionally, following recommended dilution guidelines provides a safer and more comfortable application, particularly for people with sensitive skin.
Apply the Right Amount
Using more oil does not necessarily produce better results. Instead, apply only enough rosemary oil to lightly coat the scalp and hair.
Furthermore, massage the oil gently into the scalp rather than rubbing aggressively. This approach helps distribute the oil evenly while minimizing unnecessary friction that could stress the hair or scalp.
Likewise, allow your scalp time to respond between applications instead of increasing the frequency too quickly. As a result, you can reduce the likelihood of product buildup, clogged follicles, or unnecessary irritation.
Avoid Common Application Mistakes
To use rosemary oil safely, avoid a few common mistakes that may increase the risk of discomfort.
- Do not apply undiluted rosemary essential oil directly to the scalp.
- Avoid contact with your eyes, mouth, and other sensitive areas.
- Do not use excessive amounts of oil during each application.
- Avoid applying rosemary oil to broken, infected, or severely irritated skin.
- Stop using the oil if persistent redness, burning, itching, or swelling develops.
Following these simple precautions can make your hair care routine safer and more effective over time.
Make Safety Part of Your Routine
Whether you are learning how to make rosemary oil for hair growth at home for the first time or have been using homemade rosemary oil for months, safe application should always remain a priority.
Moreover, monitor how your scalp responds and adjust your routine whenever necessary. Consistency, proper storage, careful preparation, and responsible use work together to support a healthier scalp and healthier-looking hair over the long term.
Ultimately, combining quality ingredients with safe application practices allows you to enjoy the potential benefits of rosemary oil while minimizing the likelihood of irritation or unwanted side effects.
Expert Tip: More oil does not mean better results. Instead, consistent, moderate application is far more effective than using excessive amounts. Patience, proper technique, and regular use are the factors most likely to support a healthy, sustainable hair care routine.
Do a Patch Test First
Before applying rosemary oil to your entire scalp, you should always perform a patch test. This simple step helps determine whether your skin is sensitive to the oil and can reduce the risk of irritation or allergic reactions.
Even if you’ve used carrier oils before, combining them with rosemary may affect your skin differently. Therefore, never skip this step especially if you have sensitive skin or a history of allergies.
How to Perform a Patch Test
Step 1: Apply 1–2 drops of your homemade rosemary oil to a small patch of skin, such as the inside of your forearm or behind your ear. After applying the oil (Step 2), leave the test area undisturbed for 24 hours without washing or covering it. Over the next 24 hours (Step 3), monitor your skin closely for signs of irritation, including redness, itching, swelling, or a burning sensation.
If any reaction occurs, stop using the oil immediately and rinse the area thoroughly.
If no reaction occurs, the oil is generally suitable for scalp use.
Signs of an Allergic Reaction
Stop using the oil immediately if you notice:
- Redness
- Persistent itching
- Burning sensation
- Swelling
- Rash
- Skin irritation
If the reaction is severe or does not improve, seek medical advice promptly.
Important: Never apply rosemary essential oil directly to the scalp without properly diluting it in a carrier oil.
Who Should Avoid Rosemary Oil?
Although homemade rosemary oil is well tolerated by many people, it is not suitable for everyone. Therefore, before adding it to your hair care routine, consider your scalp condition, skin sensitivity, allergies, and overall health. While rosemary oil may support a healthy scalp for many users, certain individuals should use it cautiously or avoid it altogether.
People With Sensitive Skin or Scalp Conditions
If you have sensitive skin, eczema, psoriasis, contact dermatitis, or another scalp condition, rosemary oil may cause irritation even when it is properly diluted. Likewise, people with open cuts, sores, severe dandruff, or an inflamed scalp should avoid applying rosemary oil until the affected area has healed.
Furthermore, anyone with a known allergy to rosemary or other plants in the mint family should not use rosemary-based products unless advised by a healthcare professional. Introducing the oil to already irritated skin can increase discomfort rather than provide benefits.
Always Perform a Patch Test First
Before using rosemary oil on your scalp, perform a patch test to reduce the risk of an allergic reaction. First, apply a small amount of diluted rosemary oil to a small area of skin, such as the inside of your forearm. Then, wait 24 hours and monitor the area for any signs of irritation.
If you notice redness, itching, burning, swelling, rash, or persistent discomfort, discontinue use immediately. Afterward, wash the area thoroughly with mild soap and water. If the reaction is severe or does not improve, seek medical advice promptly.
When to Speak With a Healthcare Professional
Certain people should consult a healthcare provider before using rosemary oil, particularly rosemary essential oil in concentrated forms. This precaution is especially important if you are pregnant, breastfeeding, have an underlying medical condition, or take prescription medications.
Additionally, medical guidance is recommended if you are receiving treatment for significant hair loss or another scalp disorder. Although rosemary oil may complement a hair care routine, it should not replace professional medical evaluation when an underlying condition could be contributing to hair loss.
You should speak with a healthcare provider before using rosemary oil if you:
- You have a known allergy to rosemary or other plants in the mint family.
- You have open wounds, severe scalp irritation, or an active scalp infection.
- You are receiving treatment for significant hair loss or using prescription hair-loss medications.
- You have a medical condition for which your healthcare provider recommends caution with essential oils.
- You are pregnant or breastfeeding and would like personalized medical guidance.
Special Considerations for Children
Children and individuals with very sensitive skin should use rosemary-based products only with appropriate guidance. Moreover, essential oils are highly concentrated and require careful dilution before topical use. For this reason, it is especially important to follow age-appropriate recommendations and seek professional advice whenever necessary.
Expert Advice
If you experience persistent hair loss, excessive shedding, scalp inflammation, or ongoing irritation, consult a dermatologist instead of relying solely on home remedies. A healthcare professional can identify the underlying cause, recommend appropriate treatment when needed, and advise whether rosemary oil is suitable for your specific situation.
Ultimately, rosemary oil can be a helpful addition to a hair care routine for many people. However, using it responsibly, performing a patch test, and seeking medical advice when appropriate are the best ways to minimize potential side effects while supporting healthy scalp care.
How Often Should You Use It?
One of the most common questions after learning how to make rosemary oil for hair growth is how often it should be applied. The answer depends on your hair type, scalp condition, and how your skin responds to the oil.
Using rosemary oil too frequently won’t necessarily improve your results. In fact, applying too much oil may lead to buildup, making the scalp feel greasy and requiring more frequent washing.
For most people, 2–3 applications per week provide a good balance between nourishment and scalp comfort.
Recommended Usage by Hair Type
| Hair Type | Recommended Frequency |
| Dry Hair | 2–3 times per week |
| Normal Hair | 2 times per week |
| Oily Hair | 1–2 times per week |
| Curly Hair | 2–3 times per week |
| Damaged Hair | 2–3 times per week |
| Fine Hair | 1–2 times per week |
If you’re trying rosemary oil for the first time, begin with once a week. If your scalp feels comfortable and shows no signs of irritation, you can gradually increase the frequency.
Best Practices for Safe Use
Following these simple habits will help you use your homemade rosemary oil safely and effectively:
- Always use clean hands before applying the oil.
- Massage gently—avoid scratching the scalp with your fingernails.
- Store the oil properly in a dark glass bottle away from heat and sunlight.
- Use fresh oil and discard it if it develops an unusual smell or appearance.
- Avoid contact with your eyes. If oil accidentally gets into your eyes, rinse them thoroughly with clean water.
- Wash your hair regularly to prevent excessive oil buildup.
Signs You’re Using Too Much Rosemary Oil
Applying excessive amounts of oil doesn’t speed up hair growth. Instead, it may create unnecessary buildup on the scalp.
Common signs include:
- Hair feels greasy shortly after washing.
- The scalp appears oily or heavy.
- Product buildup is difficult to remove.
- Hair loses volume.
- Mild scalp discomfort from overapplication.
If you notice these signs, reduce the amount of oil you use or apply it less frequently.
Safe vs. Unsafe Practices
| Safe Practices | Practices to Avoid |
| Perform a patch test before first use | Skip the patch test |
| Use rosemary oil in moderation | Apply excessive amounts |
| Store in a dark glass bottle | Leave the bottle in direct sunlight |
| Keep all tools clean and dry | Introduce water into the oil |
| Massage gently with fingertips | Scratch the scalp with fingernails |
| Discontinue use if irritation occurs | Continue using the oil despite a reaction |
Can You Use Rosemary Oil Every Day?
Although some people tolerate daily use, using rosemary oil every day is generally unnecessary for most hair types. Applying it 2–3 times per week is usually enough to support scalp health without causing excessive buildup.
If you have an oily scalp or fine hair, less frequent application may be more comfortable. On the other hand, individuals with very dry or curly hair may prefer slightly more frequent treatments, depending on how their hair responds.
Remember, consistency over time is far more important than daily use.
Key Takeaway
Understanding how to make rosemary oil for hair growth also means understanding how to use it responsibly. Performing a patch test, choosing the right application frequency, storing the oil correctly, and paying attention to your scalp’s response are all essential for a safe and effective routine. When used consistently and with proper care, homemade rosemary oil can become a valuable part of your natural hair care regimen while helping you maintain a healthy scalp and stronger-looking hair.
Final Thoughts on How to Make Rosemary Oil for Hair Growth
Learning how to make rosemary oil for hair growth is more than simply following a recipe. It is about creating a natural hair care treatment that suits your needs while giving you complete control over the quality of every ingredient. By selecting fresh rosemary, choosing a suitable carrier oil, and following the correct infusion method, you can prepare a nourishing oil that fits easily into your weekly hair care routine.
Although homemade rosemary oil has become a popular natural remedy, it works best when used consistently alongside healthy lifestyle habits. Instead of expecting overnight changes, focus on building a routine that supports long-term scalp health and stronger, healthier-looking hair. With patience and proper application, homemade rosemary oil can become a valuable part of your natural hair care regimen.
What to Expect After You Make Rosemary Oil for Hair Growth
After you make rosemary oil for hair growth, it is important to have realistic expectations. Homemade rosemary oil is not a miracle cure for every type of hair loss, nor does it guarantee rapid hair regrowth. Instead, it may help maintain a healthier scalp, improve hair softness, reduce breakage, and support healthier-looking hair when used regularly.
Results vary from person to person because genetics, age, hormone levels, nutrition, scalp condition, and daily hair care habits all influence hair growth. For that reason, consistency is far more important than expecting immediate improvements. Most people notice gradual changes only after several weeks or months of regular use.
How to Make Rosemary Oil for Hair Growth Part of Your Hair Care Routine
Knowing how to make rosemary oil for hair growth is only the first step. To get the most from your homemade oil, include it in a complete hair care routine. Apply the oil two or three times each week, massage it gently into the scalp, and combine it with a balanced diet rich in protein, iron, zinc, biotin, vitamin D, and other nutrients that support healthy hair.
At the same time, choose gentle shampoos, avoid excessive heat styling, limit harsh chemical treatments, and keep your scalp clean to remove product buildup. These simple habits work together to create a healthier environment for your hair and scalp.
Why Consistency Matters After You Make Rosemary Oil for Hair Growth
One of the biggest mistakes people make after they make rosemary oil for hair growth is expecting quick results. Natural hair care takes time because healthy hair grows gradually. Applying large amounts of oil will not speed up the process. Instead, regular application, proper scalp massage, and patience usually provide better long-term results.
Pay attention to how your scalp responds and adjust the frequency if necessary. A simple routine followed consistently is often more effective than occasional intensive treatments.
How to Store Homemade Rosemary Oil for Hair Growth Correctly
After you make rosemary oil for hair growth, proper storage helps preserve its freshness and quality. Store the infused oil in a clean, airtight dark glass bottle and keep it in a cool, dry place away from direct sunlight and heat.
Always use clean hands or a sanitized dropper when applying the oil to reduce contamination. If the oil develops an unusual smell, changes color significantly, or shows signs of mold, discard it and prepare a fresh batch to ensure safe use.
Expert Tips for How to Make Rosemary Oil for Hair Growth Successfully
The best results from how to make rosemary oil for hair growth come from keeping the process simple and consistent. High-quality rosemary, a suitable carrier oil, careful preparation, proper storage, and regular use matter far more than adding numerous extra ingredients.
When combined with realistic expectations, gentle hair care practices, and a healthy lifestyle, homemade rosemary oil can support a healthier scalp, stronger-looking hair, improved shine, and better overall hair quality over time.
FAQs:
Can I Use Dried Rosemary Instead of Fresh Rosemary?
Yes. In fact, dried rosemary is often the better choice for homemade rosemary oil because it is safer, more stable, and less likely to spoil during the infusion process. Although fresh rosemary has a stronger herbal aroma, it naturally contains moisture. As a result, any remaining water can increase the risk of mold, yeast, or bacterial growth if the herbs are infused before they are completely dry. Therefore, fresh rosemary requires extra preparation and careful handling.
Why Dried Rosemary Is the Safer Option
By contrast, dried rosemary contains very little moisture, making it a more dependable ingredient for DIY rosemary oil. Consequently, the chance of microbial growth is much lower, and the finished oil usually has a longer shelf life when stored properly.
Moreover, dried rosemary slowly releases its natural compounds into the carrier oil during infusion. This gradual extraction creates a balanced herbal oil without adding excess water. In addition, dried rosemary is available year-round, stores well for months, and is easy to measure accurately. For these reasons, it is an excellent choice for both beginners and experienced DIY enthusiasts.
When Fresh Rosemary Can Be Used
Fresh rosemary can also be used successfully, but it requires additional precautions. Before infusion, the sprigs should be washed if necessary and then dried completely until no surface moisture remains. Even a small amount of trapped water can reduce the oil’s stability and shorten its shelf life.
Furthermore, many experienced herbalists recommend allowing fresh rosemary to air-dry for a day or two before infusing it into oil. This simple step helps minimize moisture while preserving many of the plant’s beneficial compounds.
How to Make Rosemary Oil With Dried Rosemary
If you’re wondering how to make rosemary oil with dried rosemary for hair, the process is simple.
First, place clean, high-quality dried rosemary into a sterilized glass jar. Next, pour your preferred carrier oil—such as coconut oil, jojoba oil, olive oil, sweet almond oil, or argan oil—over the herbs until they are fully submerged.
Afterward, choose one of these infusion methods:
- Cold infusion: Allow the mixture to steep in a cool, dark place for several weeks.
- Gentle heat infusion: Warm the oil on low heat for a few hours to speed up the extraction process.
Finally, strain the oil through a fine mesh strainer or cheesecloth. Then, transfer the finished oil into a clean, airtight dark glass bottle for storage.
Which Rosemary Is Better for Hair Oil?
For most homemade recipes, dried rosemary is the recommended option. Not only does it reduce the likelihood of spoilage, but it also produces a stable infusion that lasts longer when stored in a cool, dark place.
However, fresh rosemary remains a suitable alternative if it has been dried thoroughly before infusion. Ultimately, both forms contain beneficial plant compounds, but dried rosemary offers greater convenience, consistency, and safety for home use.
Final Recommendation
Overall, dried rosemary is the best choice for homemade rosemary oil. Because it contains minimal moisture, it helps extend shelf life while lowering the risk of contamination. Additionally, it is easy to find, simple to store, and works well with a variety of carrier oils.
Therefore, if your goal is to prepare a safe, effective, and long-lasting rosemary oil for hair growth at home, using dried rosemary is generally the most reliable option. With proper preparation, careful storage, and consistent use, it can become a valuable addition to your regular hair care routine.
Best Choice: Dried rosemary for longer shelf life and lower risk of spoilage.
Which Carrier Oil Is Best for Hair Growth?
There isn’t one universal “best” carrier oil because the ideal choice depends on your hair type and scalp condition. However, several carrier oils work exceptionally well with rosemary.
Here are some of the most popular options:
| Carrier Oil | Best For |
| Jojoba Oil | Oily scalp, fine hair |
| Coconut Oil | Dry and damaged hair |
| Argan Oil | Frizzy and color-treated hair |
| Sweet Almond Oil | Curly and normal hair |
| Olive Oil | Thick, coarse, dry hair |
| Grapeseed Oil | Lightweight daily use |
If you’re learning how to make rosemary oil for hair growth at home, it’s important to choose a carrier oil that matches your hair’s specific needs rather than selecting one simply because it’s popular. For example, coconut oil may be a suitable choice for dry or damaged hair because it helps reduce protein loss and supports moisture retention. In contrast, jojoba oil is often preferred for oily scalps since its composition is similar to the skin’s natural sebum. Likewise, argan oil is a lightweight option that can help smooth frizz and add shine without weighing fine hair down. Meanwhile, sweet almond oil is commonly chosen for its conditioning properties and its ability to improve softness and manageability.
Therefore, selecting the right carrier oil can make your homemade rosemary oil more suitable for your individual hair type and scalp condition. Furthermore, considering factors such as hair texture, scalp sensitivity, and overall moisture levels will help you create a blend that better fits your routine. As a result, your rosemary oil mixture is more likely to provide balanced hydration, improve scalp comfort, and leave your hair looking healthier over time. Ultimately, a personalized blend is often more beneficial than simply following trends, because the best carrier oil is the one that works well for your unique hair care needs.
Can I Leave Rosemary Oil in My Hair Overnight?
Yes, you can leave rosemary oil in your hair overnight, provided your scalp tolerates it well.
An overnight treatment allows the oil more time to nourish the scalp and hair. However, if you have an oily scalp, fine hair, or sensitive skin, leaving rosemary oil on for 30–60 minutes before washing is often a better option. This shorter application time helps nourish the scalp while reducing the chance of excess oil buildup or irritation. Additionally, it allows you to enjoy the potential benefits of rosemary oil without making your hair feel greasy or weighed down. On the other hand, if your scalp is dry and tolerates oil well, you may choose to leave it on longer, provided your skin does not become irritated. Regardless of the timing you choose, monitor how your scalp responds and adjust your routine accordingly.
If you decide to leave the oil on overnight, take a few simple precautions. For example, wear a shower cap, satin bonnet, or soft microfiber hair wrap to help keep the oil contained. Furthermore, placing a clean towel over your pillow provides an extra layer of protection against oil stains. As a result, you can protect your bedding, maintain a cleaner sleeping environment, and allow the oil to remain in contact with your scalp throughout the night. Finally, wash your hair with a gentle shampoo the following morning to remove any remaining oil and leave your hair feeling clean, refreshed, and healthy.
Overnight treatment is generally best for:
- Dry hair
- Thick hair
- Curly hair
- Damaged hair
If you notice irritation or excessive greasiness, reduce the treatment time.
Can I Use Rosemary Oil Every Day?
For most people, daily use isn’t necessary.
Using homemade rosemary oil 2–3 times per week is generally enough to support a healthy scalp and hair care routine. Applying more oil won’t necessarily produce faster results and may lead to product buildup.
Here’s a simple guide:
- Dry Hair: 2–3 times weekly
- Normal Hair: 2 times weekly
- Oily Hair: 1–2 times weekly
- Fine Hair: 1–2 times weekly
The key is consistency, not excessive application.
How Long Does Homemade Rosemary Oil Last?
The shelf life of homemade rosemary oil depends mainly on the carrier oil used and how well it’s stored.
When prepared correctly and kept in a dark glass bottle in a cool, dry place, rosemary oil generally lasts:
- Jojoba Oil: 12–24 months
- Coconut Oil: 12–18 months
- Olive Oil: 12–18 months
- Argan Oil: 6–12 months
- Sweet Almond Oil: 6–12 months
- Grapeseed Oil: 3–6 months
Always inspect your homemade rosemary oil before each use to ensure it remains safe and effective. First, check for any signs of spoilage, including a rancid or sour smell, visible mold, cloudiness, or an unusual change in color or texture. If you notice any of these warning signs, stop using the oil immediately and discard it without hesitation. Additionally, avoid applying spoiled oil to your scalp, as it may cause irritation or contamination rather than provide benefits.
To maintain the best quality, store the oil in a clean, airtight, dark glass bottle and keep it in a cool, dry place away from direct sunlight and heat. Furthermore, using clean utensils every time you handle the oil helps reduce the risk of bacterial contamination and extends its freshness. As a result, regularly inspecting and properly storing your rosemary oil will help ensure that every application remains safe, hygienic, and beneficial for your hair and scalp.
Can Rosemary Oil Help with Dandruff?
Rosemary oil may help improve scalp comfort and reduce mild dandruff associated with dryness, especially when diluted with nourishing carrier oils such as coconut, jojoba, or argan oil. Additionally, its natural antioxidant and antimicrobial properties can help create a healthier scalp environment, which may reduce visible flakes caused by dry skin. However, it is important to understand that dandruff has multiple causes, including fungal overgrowth, excess oil production, and skin conditions such as seborrheic dermatitis. Therefore, rosemary oil should not be considered a replacement for medicated dandruff treatments when symptoms are persistent or severe.
Instead, it works best as part of a balanced hair care routine that focuses on maintaining scalp hydration and overall scalp health. Furthermore, regular use may help soothe irritation, minimize dryness, and support stronger, healthier-looking hair over time. For the best results, always dilute rosemary essential oil with a suitable carrier oil before application, perform a patch test to check for sensitivity, and use it consistently alongside a gentle, scalp-friendly shampoo. As a result, many people experience a more comfortable scalp, improved moisture balance, and healthier hair when rosemary oil is incorporated into their weekly routine.
Rosemary contains natural compounds that may support a healthier scalp environment. Additionally, regular scalp massages with rosemary-infused oil can help distribute natural oils and improve overall scalp condition.
However, it is important to understand that homemade rosemary oil is not a medical treatment for chronic dandruff or scalp disorders. Consequently, if your dandruff is severe, persistent, or accompanied by redness, pain, or excessive flaking, you should consult a dermatologist for an accurate diagnosis and appropriate treatment.
Furthermore, for mild dryness, combining rosemary oil with gentle hair care practices such as using a sulfate-free shampoo and avoiding excessive heat styling—may help improve scalp health over time.