Introduction:
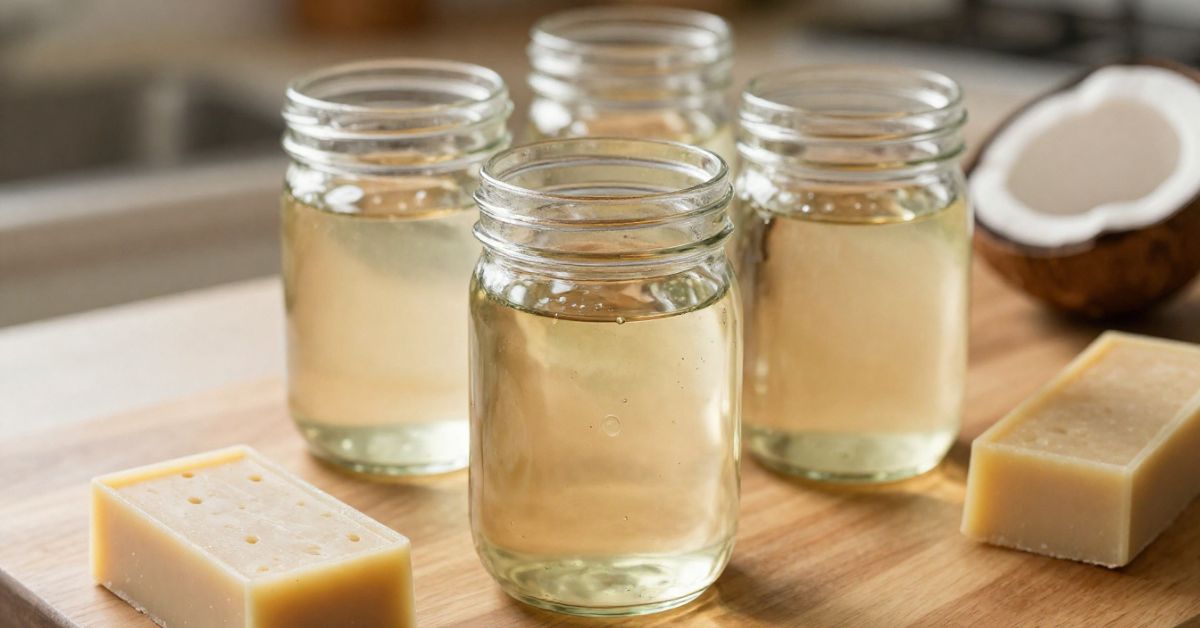
Coconut oil for soap making is one of the most trusted ingredients in homemade soap. It gives soap a firm texture, creates a rich lather, and helps bars last longer. Because of these qualities, many beginners and experienced soap makers use it as a core oil in their recipes. However, the real value of coconut oil for soap making goes beyond bubbles. It also affects cleansing power, hardness, and the overall feel of the finished bar. That is why understanding how it works matters before you start mixing a batch.
Why Coconut Oil for Soap Making Is So Popular
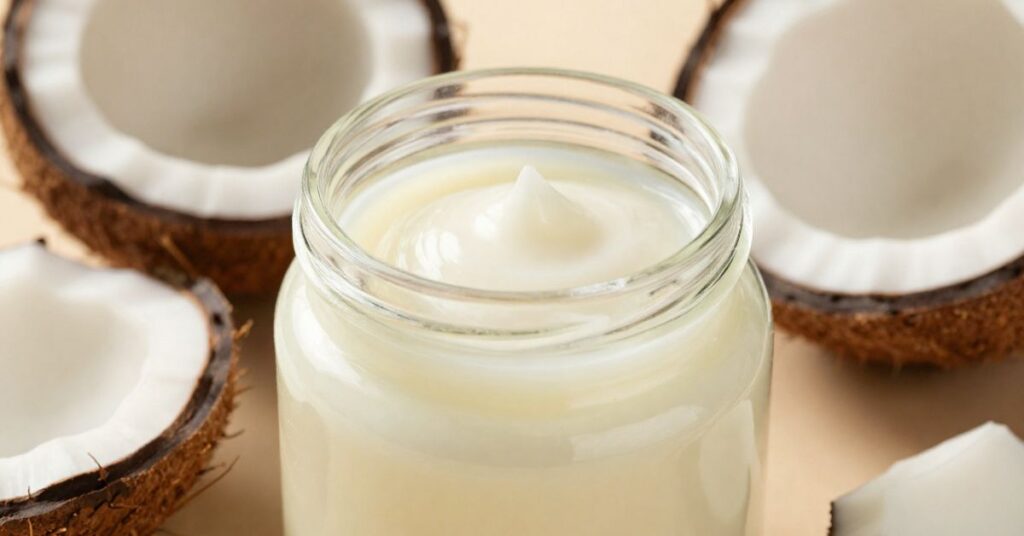
Coconut oil has become a favorite in soap making because it performs well in many different recipes. It is easy to find, simple to work with, and delivers fast results during the soap-making process. Unlike some oils that add softness but little structure, coconut oil helps create a bar that unmolds well and holds its shape. This makes it especially useful for both cold process and hot process soap making.
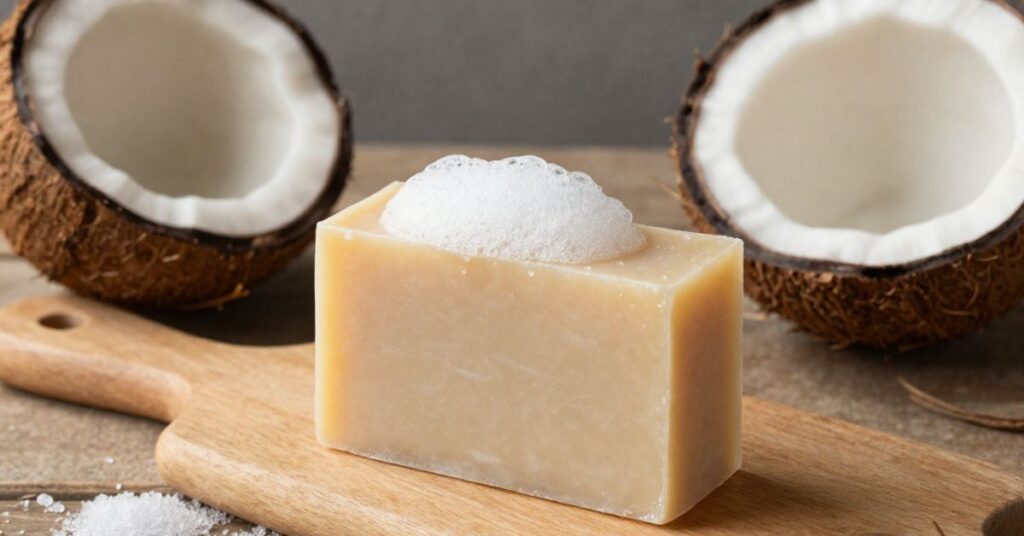
Another reason coconut oil for soap making is so popular is its strong cleansing ability. It removes oils and dirt effectively, which gives soap that clean, fresh feeling people often want. At the same time, it also produces a creamy, stable lather that feels pleasant on the skin. For many soap makers, this balance of hardness, cleansing, and foam makes coconut oil an essential ingredient rather than just an optional one.
Coconut oil also works well in many soap styles. You can use it in simple homemade bars, luxury soaps, scented bath bars, or recipe blends with other oils. Because it is so versatile, it gives soap makers more control over the final result. Whether someone wants a basic recipe or a more advanced formula, coconut oil often fits into the plan very naturally.
What makes coconut oil different from other soap oils
Coconut oil stands out because it behaves differently from oils like olive oil, castor oil, or sunflower oil. Olive oil, for example, creates a softer and milder bar, but it usually needs a longer cure time and does not give much foam. Coconut oil, on the other hand, makes soap harder faster and boosts lather almost immediately. That difference makes it valuable in recipes that need better structure and better cleansing power.
It also contains a high amount of lauric acid, which is one of the main reasons it creates such a bubbly lather. This fatty acid helps the soap cut through grease and makes the bar feel more active during washing. As a result, coconut oil for soap making often plays a major role in recipes that focus on performance rather than just softness. When used correctly, it can improve the whole soap formula and make the finished bar feel more professional.
Benefits and possible drawbacks of using coconut oil
The biggest benefit of coconut oil is its ability to create a hard, long-lasting, and highly cleansing soap bar. It helps the soap set well, which makes cutting and handling easier. It also produces a rich lather that many users enjoy. In addition, coconut oil blends well with other oils, so soap makers can use it to balance a recipe instead of letting it dominate the entire formula.
Still, coconut oil is not perfect for every recipe. If you use too much of it, the soap can become overly cleansing and may feel drying on sensitive skin. This is why many soap makers do not use 100% coconut oil unless they carefully adjust the superfat level. In other words, coconut oil works best when you respect its strength. Used wisely, it becomes a powerful ingredient. Used carelessly, it can make the soap too harsh.
That is why learning the right balance matters so much. The best coconut oil for soap making is not just about quality alone. It is also about using the right amount in the right recipe. When you understand its strengths and limits, you can make soap that feels clean, lasts well, and still stays gentle enough for everyday use.
How to Choose the Best Coconut Oil for Soap Making
Choosing the right coconut oil for soap making can improve the quality of your bars from the very first batch. Not every coconut oil performs the same way, even if the label looks similar. Some options work better for hardness and lather, while others are better for skin feel or color. That is why soap makers should look beyond price and choose coconut oil based on the type of soap they want to create.
The best coconut oil for soap making is usually the one that fits your recipe goals, your budget, and your final soap style. If you want a clean, hard, bubbly bar, you need an oil that behaves well in soap calculations and stays consistent in quality. A good choice also makes measuring easier, blending smoother, and curing more predictable. In short, the oil you select can shape the whole result.
Refined vs unrefined coconut oil
Refined coconut oil is processed more heavily, so it usually has a neutral scent and a lighter color. This makes it a strong choice for soap makers who want more control over fragrance and appearance. Because it does not carry a strong coconut smell, it works well in scented soaps, colored bars, and recipes where you want other ingredients to stand out. It also tends to give reliable results in soap making because it behaves consistently.
Unrefined coconut oil, which many people also call virgin coconut oil, keeps more of its natural aroma and character. It often smells fresher and more natural, which can be appealing in handmade soap. However, its scent may not always stay strong after saponification, so it should not be the only reason you choose it. Many soap makers like it for natural-style recipes, but it can sometimes affect the final look and smell more than refined oil does.
Both types can work well in coconut oil for soap making. The better choice depends on the style of soap you want. If you want clean performance and a neutral base, refined oil often wins. If you want a more natural ingredient profile, unrefined oil may feel more attractive. Either way, the quality of the oil matters more than the marketing label on the front.
Which type creates better soap bars
The better coconut oil for soap bars depends on what you want the bar to do. Refined coconut oil often gives a cleaner-looking soap and a more neutral base, which helps when you plan to add fragrance, clays, colors, or other design ingredients. It also creates strong lather and firm bars, which makes it practical for everyday soap recipes.
Unrefined coconut oil can also make excellent bars, especially when you want a more natural and minimally processed formula. It may bring a softer visual character and a more “artisanal” feel to the soap. However, it does not automatically create a better bar just because it is less processed. In soap making, the final result depends more on the full recipe than on the oil type alone.
In most cases, soap makers choose refined coconut oil for control and consistency, while they choose unrefined oil for natural branding and a more rustic feel. If your goal is high-performance soap with a dependable finish, refined oil often gives a small advantage. If your goal is a handmade product with a natural identity, unrefined coconut oil can be the better fit. The best choice comes from matching the oil to the recipe, not from following a trend.
How Much Coconut Oil for Soap Making Gives the Best Results
The amount of coconut oil you use in soap making has a direct effect on the final bar. A small amount can improve lather and hardness without making the soap too strong. A large amount can create a very firm, bubbly bar, but it can also make the soap more cleansing than some skin types prefer. That is why the best result usually comes from balance, not from using the highest amount possible.
In most soap recipes, coconut oil works best as part of a blended formula. It supports the other oils and helps the bar perform better overall. When used in the right ratio, it gives the soap a clean feel, a solid shape, and a rich foam that many people like. However, the exact amount depends on whether you want a gentle bath soap, a strong cleansing bar, or a simple homemade recipe for daily use.
| Coconut Oil Amount | Result in Soap | Best For | Possible Drawback |
| 10% to 20% | Adds mild hardness and better lather | Gentle everyday soap | May not give enough bubbles on its own |
| 25% to 30% | Balanced performance and cleansing | Most standard soap recipes | Needs good recipe balance with other oils |
| 50% | Very bubbly and harder bars | Strong cleansing bars | Can feel drying if not super-fatted well |
| 75% to 100% | Extremely firm and cleansing soap | Advanced recipes and specialty bars | Too harsh for many skin types without careful adjustment |
This table shows why coconut oil for soap making works best when you match the percentage to the purpose of the soap. For most people, the middle range gives the most practical results. It offers enough cleansing and lather while still allowing the soap to stay comfortable on the skin.
Using 100% coconut oil in soap
You can make soap with 100% coconut oil, but this style needs careful handling. A full coconut oil soap bar becomes very hard, very bubbly, and very cleansing. That makes it useful in certain situations, such as laundry soap or high-foam cleansing bars. However, it may feel too strong for regular body use unless you lower the cleansing effect through superfatting.
A 100% coconut oil recipe usually needs a higher superfat level than mixed-oil recipes. This helps offset the strong cleansing power of the oil and makes the soap gentler on skin. Without that adjustment, the bar may strip away too much natural moisture. So while 100% coconut oil can work, it is usually better for experienced soap makers who understand soap calculations well.
Understanding superfat and balance
Superfat means leaving a small amount of oil unsaponified in the soap. This extra oil helps make the bar milder and more skin-friendly. When you use coconut oil for soap making, superfat becomes especially important because coconut oil is naturally more cleansing than many other oils. The extra oil helps reduce dryness and makes the soap feel more balanced.
Balance matters because soap should clean without feeling harsh. If the recipe contains too much coconut oil and too little conditioning oil, the bar may become too strong. On the other hand, if you use too little coconut oil, the soap may lose hardness and lather. The best soap recipe usually combines coconut oil with other oils in a thoughtful ratio so the final bar feels both effective and pleasant.
In simple terms, the right amount of coconut oil depends on your goal. For a basic all-purpose bar, a moderate percentage usually works best because it keeps the soap balanced and gentle. However, if you want stronger cleansing soaps, you can increase the percentage to achieve more cleansing power. On the other hand, for sensitive skin, you should lower the ratio and focus more on maintaining a gentle, skin-friendly balance.
That is the real secret behind successful coconut oil soap making.
Everything You Need Before Starting Coconut Oil for Soap Making
Before you begin making soap, preparing everything in advance makes the process smoother, safer, and more consistent. Soap making becomes much easier when ingredients are measured correctly and tools are ready before mixing starts. This preparation also reduces mistakes that can affect texture, curing time, or the final quality of the soap.
If you are trying coconut oil for soap making for the first time, avoid rushing into the process. Set up your workspace, organize supplies, and understand what each ingredient does. A good setup not only improves results but also makes the entire experience more enjoyable.
Ingredients checklist
The quality of ingredients plays a major role in the final soap bar. Even a simple coconut oil soap recipe can produce excellent results when the ingredients are selected carefully.
| Ingredient | Purpose | Notes |
| Coconut oil | Creates hardness and rich lather | Core ingredient in the recipe |
| Lye (Sodium Hydroxide) | Converts oils into soap | Must be measured accurately |
| Distilled water | Helps dissolve lye safely | Preferred over tap water |
| Supporting oils (optional) | Improve conditioning and balance | Commonly added for softness |
| Essential oils (optional) | Add fragrance | Use skin-safe amounts |
| Natural colorants (optional) | Improve appearance | Add after reaching trace |
When learning how to use coconut oil for soap making, keep the ingredient list simple at first. Once you understand the process, you can start experimenting with custom blends and advanced formulas.
Tools and equipment
Good equipment makes soap making cleaner, safer, and easier to manage. Most tools are reusable, so once you build a basic setup, future batches become more efficient.
| Tool | Why You Need It |
| Digital scale | Accurate measurement of oils and lye |
| Heat-safe mixing containers | Safe mixing of ingredients |
| Silicone spatula | Easy stirring and scraping |
| Stick blender | Speeds up reaching trace |
| Soap mold | Shapes and sets the soap |
| Thermometer | Helps control mixing temperature |
| Safety gloves | Protects hands during lye handling |
| Safety glasses | Protects eyes from splashes |
Never use food preparation tools interchangeably with soap-making equipment. Keeping dedicated tools helps maintain safety and consistency.
Optional add-ins for better results
Once you feel comfortable with the basics, you can improve your coconut oil soap by adding ingredients that change texture, appearance, and user experience. These additions are optional, but they can make handmade soap feel more unique and premium.
| Add-In | Benefit |
| Oatmeal | Adds gentle exfoliation |
| Activated charcoal | Creates deep color and cleansing appeal |
| Honey | Adds a smoother feel |
| Kaolin clay | Improves slip and texture |
| Dried botanicals | Enhances appearance |
| Aloe vera | Adds a more luxurious feel |
| Shea butter | Supports a softer skin feel |
If you are exploring how to make coconut oil for soap making into a more advanced craft, these additions can help create distinctive soap bars without changing the core process.
A simple approach often gives the best results. Start with fewer ingredients, understand how each one behaves, and then expand your recipes gradually. Strong soap making comes from consistency, not complexity.
Read More:https://pureoilshub.com/grapeseed-oil-for-hair/
Step-by-Step Coconut Oil for Soap Making Recipe
Making soap at home can feel technical at first, but the process becomes much easier when broken into simple stages. This coconut oil for soap making recipe is designed to create a balanced soap bar with good hardness, rich lather, and an easy workflow for beginners. Instead of adding too many ingredients, start with a simple formula and focus on getting clean, consistent results.
This simple coconut oil soap recipe follows a structured process so every stage becomes easier to understand and repeat.
Basic Coconut Oil Soap Recipe
| Ingredient | Amount |
| Coconut oil | 500 g |
| Distilled water | 190 g |
| Sodium hydroxide (lye) | Calculate accurately with a soap calculator |
| Optional fragrance | 10–20 g |
| Optional color | As needed |
Always measure ingredients by weight rather than volume. Small measurement differences can affect the final soap quality.
Preparing the ingredients
Preparation creates better results than fixing mistakes later. Before starting, organize your workspace and prepare every item in advance.
- Measure all ingredients separately.
- Wear gloves and safety glasses.
- Prepare molds before mixing.
- Keep children and pets away from the workspace.
- Use a digital scale for accurate measurements.
- Work in a ventilated area.
Once everything is ready, melt the coconut oil slowly until fully liquid. After that, allow the oil to cool slightly while preparing the lye solution. Keeping temperatures controlled helps the mixture combine more smoothly.
Mixing oils and lye safely
This stage is the most important part of soap making. Lye reacts with oils to create actual soap, so careful handling matters.
- Add lye into water slowly.
- Never pour water into lye.
- Stir until fully dissolved.
- Allow the solution to cool.
- Pour lye solution into melted oils.
- Blend gradually using a stick blender.
Continue mixing until the soap reaches a trace. Trace means the mixture becomes thicker and leaves visible lines when stirred. At this point, add fragrance, color, or other optional ingredients.
For people learning how to use coconut oil for soap making, staying patient during this stage improves texture and prevents separation.
Pouring and shaping the soap
After reaching the trace, work steadily because the mixture may begin to thicken.
- Pour soap into prepared molds.
- Tap molds lightly to release air bubbles.
- Smooth the surface using a spatula.
- Add decorative texture if desired.
- Cover molds to support even setting.
Leave the soap undisturbed while it hardens. Depending on room conditions, unmolding usually becomes easier after one to two days.
Curing for the perfect finish
Fresh soap is not ready to use immediately. Curing allows water to evaporate and improves the final quality of the soap.
- Remove bars from molds carefully.
- Cut bars into equal sizes.
- Place soap in a dry, ventilated area.
- Rotate bars occasionally.
- Avoid stacking during early curing.
Most homemade coconut oil soap benefits from curing for approximately four to six weeks. During this time, the bars become harder, milder, and longer lasting.
A proper cure transforms a fresh batch into a soap that feels smoother, performs better, and lasts much longer during daily use. That final waiting period often makes the biggest difference in homemade soap quality.
Common Mistakes to Avoid in Coconut Oil for Soap Making
Coconut oil can produce excellent soap, but small mistakes during the process can change the final result dramatically. A soap bar that feels too dry, becomes soft, cracks, or does not cure properly often comes from avoidable errors rather than bad ingredients. The good news is that most problems become easy to prevent once you understand what causes them.
If you are new to coconut oil for soap making, focusing on consistency and proper measurements will usually give better results than trying advanced techniques too early.
Using too much coconut oil
One of the most common mistakes is assuming more coconut oil automatically means better soap. Coconut oil creates hardness and strong cleansing power, but excessive amounts can make the finished bar feel overly drying.
To keep the recipe balanced:
- Avoid increasing coconut oil without adjusting the formula.
- Combine coconut oil with conditioning oils when needed.
- Consider superfatting for a gentler result.
- Test smaller batches before scaling up.
- Focus on performance rather than maximum foam.
Using balanced amounts usually creates soap that feels cleaner and more comfortable for regular use.
Incorrect temperatures
Temperature control has a major effect on how soap behaves during mixing and curing. Oils that are too hot or too cool can lead to uneven texture, separation, fast thickening, or poor finishing.
Watch for these temperature-related mistakes:
- Mixing extremely hot oils and lye.
- Combining ingredients before cooling properly.
- Allowing large temperature differences.
- Heating oils repeatedly.
- Ignoring room conditions during production.
For better consistency:
| Situation | Possible Result |
| Oils too hot | Soap thickens too quickly |
| Oils too cool | Poor mixing and uneven texture |
| Large temperature difference | Separation risk |
| Stable moderate temperatures | Smoother soap making process |
Maintaining stable conditions usually produces cleaner-looking bars and more predictable results.
Poor curing practices
Many beginners think soap is ready once it becomes solid. In reality, curing is one of the most important stages of soap making. Skipping or shortening this stage often reduces quality.
Avoid these common curing mistakes:
- Using soap immediately after unmolding.
- Storing bars in closed containers.
- Stacking bars too early.
- Keeping soap in humid spaces.
- Cutting bars unevenly.
Good curing habits include:
- Place bars in open airflow.
- Leave space between each piece.
- Rotate bars occasionally.
- Store away from direct sunlight.
- Allow full curing time before use.
Proper curing improves hardness, creates a smoother feel, and helps the soap last longer.
Quick Mistake Prevention Checklist
| Do | Avoid |
| Measure accurately | Estimating ingredients |
| Keep balanced recipes | Using excessive coconut oil |
| Control temperatures | Extreme heat changes |
| Cure completely | Using soap too early |
Understanding these mistakes also helps reduce some of the commonly discussed disadvantages of coconut oil soap. In many cases, issues blamed on coconut oil actually happen because of recipe imbalance or rushed curing.
Customize Coconut Oil Soap Like a Pro
Once you understand the basics, customizing your soap becomes one of the most enjoyable parts of the process. Coconut oil creates a strong base that works well with colors, fragrances, and design techniques. Small changes can completely transform how the final bar looks, feels, and performs.
Customizing does not mean making the recipe complicated. In many cases, a few thoughtful additions create a soap that feels more premium and unique without reducing quality.
Adding natural color
Natural colorants can give handmade soap a distinctive appearance while keeping the formula simple. Instead of artificial colors, many soap makers prefer ingredients that create softer and more natural shades.
Popular options include:
- Activated charcoal for deep gray or black tones
- Turmeric for warm yellow shades
- Cocoa powder for rich brown color
- Spirulina for muted green tones
- Clay powders for soft earthy colors
- Beetroot powder for subtle pink effects
| Natural Color | Typical Appearance |
| Activated charcoal | Black to dark gray |
| Turmeric | Golden yellow |
| Cocoa powder | Brown |
| Kaolin clay | Soft cream |
| Spirulina | Light green |
Add color gradually because stronger concentrations may affect the final appearance more than expected.
Adding fragrance and essential oils
Fragrance changes the entire experience of using handmade soap. Since coconut oil has a relatively neutral profile after saponification, it pairs well with many scent combinations.
Popular fragrance ideas include:
- Lavender for a clean and relaxing scent
- Peppermint for freshness
- Lemon for a bright finish
- Eucalyptus for a refreshing feel
- Vanilla for warmth
- Rose for a softer floral profile
For better results:
- Add fragrance after reaching the trace.
- Use skin-safe fragrance levels.
- Test combinations in small batches.
- Avoid excessive fragrance loading.
| Fragrance Type | Style |
| Lavender | Calm and classic |
| Citrus | Fresh and clean |
| Mint | Cooling effect |
| Floral | Soft and elegant |
| Herbal | Natural and earthy |
Balanced fragrance usually performs better than very strong scents.
Creating different textures
Texture changes how soap looks and feels during use. A smooth bar feels polished, while textured soap often gives a more handmade and premium appearance.
Simple ways to create texture include:
- Leave the top surface smooth.
- Use a spoon to create waves.
- Add oatmeal for a gentle texture.
- Layer different colors.
- Create swirls using slow mixing.
- Add botanical decoration on top.
Texture styles can also influence user experience:
| Texture Style | Final Effect |
| Smooth finish | Clean and modern look |
| Swirled design | Decorative appearance |
| Layered soap | Premium visual effect |
| Exfoliating texture | More tactile feel |
Customization should improve the soap rather than overpower it. Start with one change at a time so you can understand how each addition affects the final result.
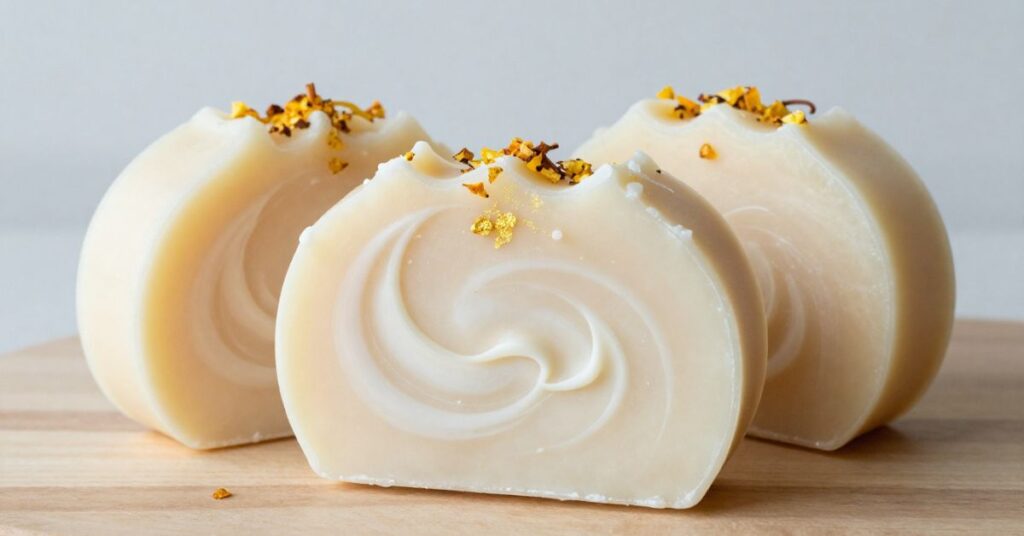
With practice, even a basic coconut oil soap recipe can look and feel like a professional handmade product.
How to Store Coconut Oil Soap and Extend Shelf Life
Proper storage plays a major role in maintaining the quality, hardness, and longevity of handmade soap. Even if you use the best coconut oil for soap making, poor storage conditions can reduce performance over time. Good storage keeps the bars firm, preserves fragrance, and prevents moisture damage.
Coconut oil soap is naturally long-lasting, but it still needs the right environment to stay in its best condition. Once the curing process is complete, how you store the soap determines how well it performs during daily use.
Best storage conditions
After curing, soap should be stored in a dry, cool, and well-ventilated space. Airflow is important because it prevents moisture buildup, which can soften the bars or reduce their lifespan.
To store coconut oil soap properly:
- Keep bars in a dry place with good airflow.
- Avoid storing in humid bathrooms.
- Place soap on open shelves or racks.
- Keep bars separated to allow ventilation.
- Protect from direct sunlight to avoid fading.
| Storage Condition | Effect on Soap |
| Dry & ventilated space | Keeps soap firm and long-lasting |
| Humid environment | Softens soap and reduces life |
| Direct sunlight | Can fade color and fragrance |
| Airtight container | May trap moisture and cause sweating |
If you are learning how to use coconut oil for soap making, understanding storage is just as important as learning the recipe itself.
How long homemade soap lasts
Homemade soap made with coconut oil generally lasts a long time because coconut oil creates a hard and stable bar. However, shelf life depends on storage conditions, recipe balance, and curing time.
Typical lifespan expectations:
- Properly cured and stored soap: 1 to 2 years
- Poorly stored soap: 6 to 12 months
- High-coconut oil bars: longer hardness but may lose fragrance over time
To extend shelf life:
- Always cure soap for 4–6 weeks before storage.
- Wrap soap in breathable material like paper or cloth.
- Avoid plastic wrapping for long-term storage.
- Rotate stock so older bars are used first.
- Store fragrance-sensitive soaps separately.
A simple rule applies: the better the airflow, the better the soap lasts.
Extra Tips to Extend Soap Life
- Keep soap away from running water when not in use.
- Use soap dishes that drain water quickly.
- Avoid leaving soap in standing water.
- Store extra bars in a cool cupboard.
- Label batches for tracking production dates.
Well-stored coconut oil soap not only lasts longer but also maintains better texture, fragrance, and performance. This ensures every bar feels as good as the day it was made.
Final Verdict: Is Coconut Oil for Soap Making Worth It?
Coconut oil for soap making is absolutely worth it when you understand how to use it correctly. It is one of the most reliable base oils because it consistently produces hard bars, strong cleansing power, and rich lather. These qualities make it a core ingredient in both beginner and advanced soap recipes.
However, its value depends on balance. Coconut oil alone can create a soap that feels too strong for sensitive skin, but when blended properly with other oils, it becomes one of the most powerful ingredients in handmade soap formulation. This is why most professional recipes use coconut oil as a supporting structure rather than the only oil.
When used in the right ratio, coconut oil improves almost every part of soap quality:
- It increases bar hardness and durability.
- It boosts foaming and cleansing performance.
- It helps soap unmold easily and last longer.
- It supports better texture and consistency.
At the same time, it is important to remember its limitations. Overusing coconut oil can lead to dryness, especially for sensitive or dry skin types. That is why understanding proper ratios, superfatting, and blending is essential for success.
Final takeaway
If your goal is to create stable, long-lasting, and well-lathering soap, coconut oil is one of the best ingredients you can choose. It is beginner-friendly, widely available, and highly effective when used in a balanced formula.
In simple terms, coconut oil for soap making is not just useful, it is foundational. The key is not avoiding it or overusing it, but learning how to control it within your recipe. When you do that, it consistently delivers professional-quality results even in homemade soap batches.
FAQs:
This section answers the most common questions about coconut oil for soap making, especially for beginners who want clarity before starting their first batch. These FAQs also help you understand practical concerns like usage, safety, and curing time in a simple way.
Can you make soap with only coconut oil?
Yes, you can make soap using only coconut oil, but it must be done carefully. A 100% coconut oil soap creates a very hard bar with strong cleansing and rich lather. However, it can feel drying on the skin if not balanced properly.
To make it safer for skin use:
- Increase superfat level for extra moisture.
- Use it mainly for body wash or hand soap.
- Avoid overuse on sensitive or dry skin.
- Test small batches before scaling.
So, while it works, most soap makers prefer blending coconut oil with other oils for better balance.
Do you need lye for soap making?
Yes, lye (sodium hydroxide) is essential for traditional soap making. Without lye, oils like coconut oil cannot turn into true soap. The process that happens between oil and lye is called saponification.
Important points:
- Lye is fully consumed during soap making.
- No lye remains in properly cured soap.
- It must be measured accurately for safety.
- Always add lye to water, not the reverse.
Without lye, you are not making soap—you are making a cosmetic oil blend or melt-and-pour product.
Is coconut oil soap good for every skin type?
Coconut oil soap works well for many skin types, but not all. It is highly cleansing, which means it can remove oil effectively. This makes it great for oily skin but sometimes too strong for dry or sensitive skin if used in high amounts.
Skin compatibility overview:
- Oily skin: Very effective and refreshing
- Normal skin: Works well in balanced recipes
- Dry skin: May feel slightly stripping if overused
- Sensitive skin: Needs lower coconut oil ratio
When properly balanced with other oils, coconut oil soap becomes suitable for most users.
How long should homemade soap cure?
Homemade soap should generally cure for 4 to 6 weeks. This curing time allows water to evaporate and the soap to fully harden and stabilize.
During curing:
- Soap becomes harder and longer lasting.
- Lather improves over time.
- Mildness increases gradually.
- Moisture content reduces.
Shortening this time can result in softer, less durable soap, so patience is important for quality results.
